源码之Executor
1. 向RM申请资源
回到runDriver()方法,Driver线程执行,我们的WordCount程序中有new SparkContext(conf): 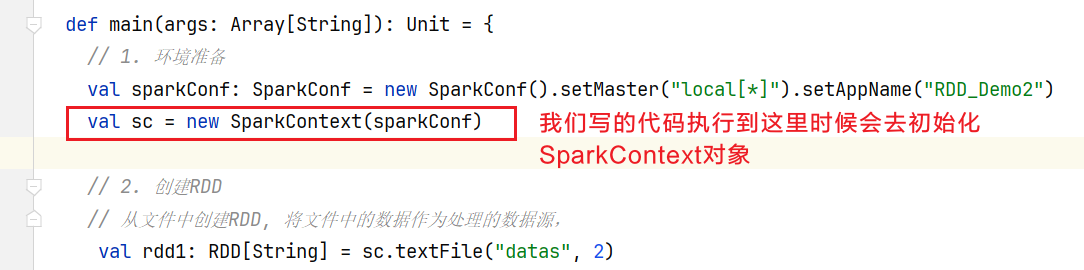 进入SparkContext类中,初始化的时候会自动执行代码块代码,其中有一段postStartHook()代码
  点击进去发现是抽象方法,查找实现为YarnClusterScheduler.scala的代码:
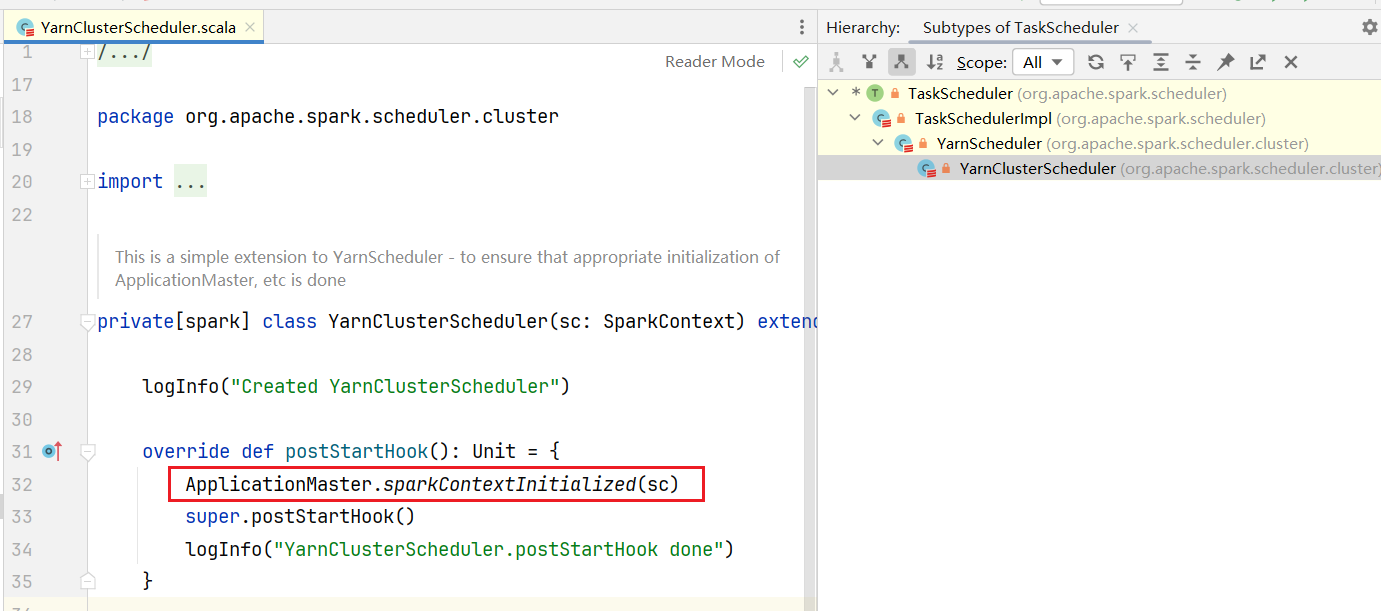 点击进入sparkContextInitialized()方法
 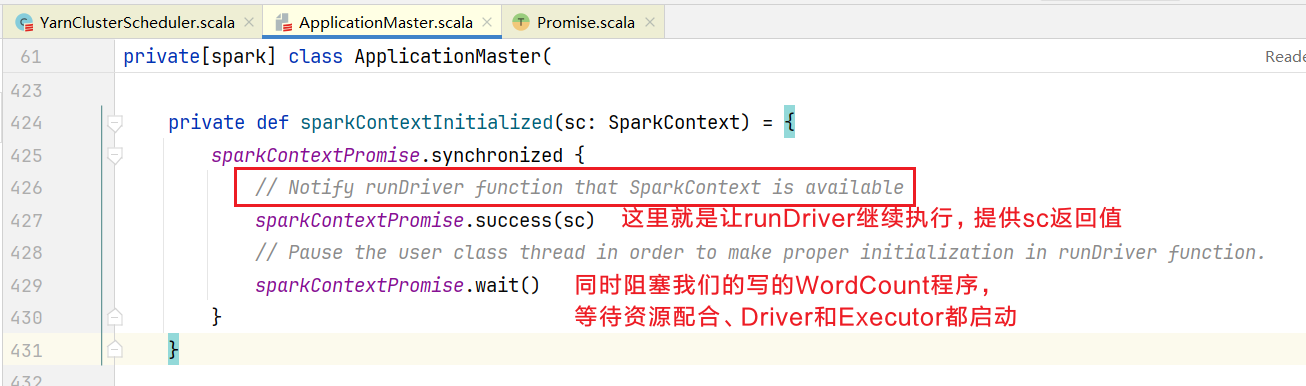 如果SparkContext初始化完毕后,继续执行runDriver后续代码:
private def runDriver(): Unit = {
    addAmIpFilter(None, System.getenv(ApplicationConstants.APPLICATION_WEB_PROXY_BASE_ENV))
    userClassThread = startUserApplication()

    val totalWaitTime = sparkConf.get(AM_MAX_WAIT_TIME)
    try {
        // 得到线程执行结果信息
      val sc = ThreadUtils.awaitResult(sparkContextPromise.future,
        Duration(totalWaitTime, TimeUnit.MILLISECONDS))
      if (sc != null) {
        // 获取远程通信信息
        val rpcEnv = sc.env.rpcEnv

        val userConf = sc.getConf
        val host = userConf.get(DRIVER_HOST_ADDRESS)
        val port = userConf.get(DRIVER_PORT)
        // 向AM注册, 为了申请资源
        registerAM(host, port, userConf, sc.ui.map(_.webUrl), appAttemptId)

        val driverRef = rpcEnv.setupEndpointRef(
          RpcAddress(host, port),
          YarnSchedulerBackend.ENDPOINT_NAME)
          // 创建资源分配器
        createAllocator(driverRef, userConf, rpcEnv, appAttemptId, distCacheConf)
      } else {
        // Sanity check; should never happen in normal operation, since sc should only be null
        // if the user app did not create a SparkContext.
        throw new IllegalStateException("User did not initialize spark context!")
      }
      resumeDriver()
      userClassThread.join()
    } catch {
      ......
    } finally {
      resumeDriver()
    }
}查询createAllocator()方法
private def createAllocator(
      driverRef: RpcEndpointRef,
      _sparkConf: SparkConf,
      rpcEnv: RpcEnv,
      appAttemptId: ApplicationAttemptId,
      distCacheConf: SparkConf): Unit = {

    ......
    val appId = appAttemptId.getApplicationId().toString()
    val driverUrl = RpcEndpointAddress(driverRef.address.host, driverRef.address.port,
      CoarseGrainedSchedulerBackend.ENDPOINT_NAME).toString
    val localResources = prepareLocalResources(distCacheConf)
    // 创建资源分配器
    allocator = client.createAllocator(
      yarnConf,
      _sparkConf,
      appAttemptId,
      driverUrl,
      driverRef,
      securityMgr,
      localResources)

    ......
    // 获取ResouceManager上面可用分配的资源信息
    allocator.allocateResources()
    ......
}2. 得到容器资源并自主选择
进入allocateResources()方法查看
def allocateResources(): Unit = synchronized {
    updateResourceRequests()

    val progressIndicator = 0.1f
    // 得到RM的响应信息
    val allocateResponse = amClient.allocate(progressIndicator)
    // 获取可分配的容器信息列表
    val allocatedContainers = allocateResponse.getAllocatedContainers()
    allocatorNodeHealthTracker.setNumClusterNodes(allocateResponse.getNumClusterNodes)

    if (isYarnExecutorDecommissionEnabled) {
      handleNodesInDecommissioningState(allocateResponse)
    }
    // 如果可分配的容器还有,就会去处理容器
    if (allocatedContainers.size > 0) {
      logDebug(("Allocated containers: %d. Current executor count: %d. " +
        "Launching executor count: %d. Cluster resources: %s.")
        .format(
          allocatedContainers.size,
          getNumExecutorsRunning,
          getNumExecutorsStarting,
          allocateResponse.getAvailableResources))

      handleAllocatedContainers(allocatedContainers.asScala.toSeq)
    }
    ......
}进入handleAllocatedContainers()方法
def handleAllocatedContainers(allocatedContainers: Seq[Container]): Unit = {
    val containersToUse = new ArrayBuffer[Container](allocatedContainers.size)

    // 根据主机名重新封装容器列表
    val remainingAfterHostMatches = new ArrayBuffer[Container]
    for (allocatedContainer <- allocatedContainers) {
      matchContainerToRequest(allocatedContainer, allocatedContainer.getNodeId.getHost,
        containersToUse, remainingAfterHostMatches)
    }

    // 按照匹配机架找到首选位置的容器
    ......
    // 使用这些按照规则筛选的容器
    runAllocatedContainers(containersToUse)

    logInfo("Received %d containers from YARN, launching executors on %d of them."
      .format(allocatedContainers.size, containersToUse.size))
}进入runAllocatedContainers()方法
private def runAllocatedContainers(containersToUse: ArrayBuffer[Container]): Unit = synchronized {
    // 遍历准备使用的容器
    for (container <- containersToUse) {
      val rpId = getResourceProfileIdFromPriority(container.getPriority)
      executorIdCounter += 1
      val executorHostname = container.getNodeId.getHost
      val containerId = container.getId
      val executorId = executorIdCounter.toString
      val yarnResourceForRpId = rpIdToYarnResource.get(rpId)
      assert(container.getResource.getMemory >= yarnResourceForRpId.getMemory)
      logInfo(s"Launching container $containerId on host $executorHostname " +
        s"for executor with ID $executorId for ResourceProfile Id $rpId")

      val rp = rpIdToResourceProfile(rpId)
      val defaultResources = ResourceProfile.getDefaultProfileExecutorResources(sparkConf)
      // 获得容器内存
      val containerMem = rp.executorResources.get(ResourceProfile.MEMORY).
        map(_.amount).getOrElse(defaultResources.executorMemoryMiB).toInt

      assert(defaultResources.cores.nonEmpty)
      // 获取容器的CPU资源信息
      val defaultCores = defaultResources.cores.get
      val containerCores = rp.getExecutorCores.getOrElse(defaultCores)

      val rpRunningExecs = getOrUpdateRunningExecutorForRPId(rpId).size

      // 在运行的excutor数量 < 运行作业所需要的executor数量, 表示此时运行的容器还没有达到完成作业的数量
      // 没达到就启动更多容器
      if (rpRunningExecs < getOrUpdateTargetNumExecutorsForRPId(rpId)) {
        getOrUpdateNumExecutorsStartingForRPId(rpId).incrementAndGet()
        launchingExecutorContainerIds.add(containerId)
        // launchContainers是通过配置参数spark.yarn.launchContainers获得,默认就是true
        if (launchContainers) {
            // 线程池启动ExecutorRunnable线程
          launcherPool.execute(() => {
            try {
              new ExecutorRunnable(
                Some(container),
                conf,
                sparkConf,
                driverUrl,
                executorId,
                executorHostname,
                containerMem,
                containerCores,
                appAttemptId.getApplicationId.toString,
                securityMgr,
                localResources,
                rp.id
              ).run()
              updateInternalState(rpId, executorId, container)
            } catch {
              ......
            }
          })
        } else {
          // For test only
          updateInternalState(rpId, executorId, container)
        }
      } else {
        logInfo(("Skip launching executorRunnable as running executors count: %d " +
          "reached target executors count: %d.").format(rpRunningExecs,
          getOrUpdateTargetNumExecutorsForRPId(rpId)))
      }
    }
}查看ExecutorRunnable线程类的run()方法
def run(): Unit = {
    logDebug("Starting Executor Container")
    nmClient = NMClient.createNMClient()
    nmClient.init(conf)
    // 连接NodeManager
    nmClient.start()
    // 启动容器
    startContainer()
}3. 启动容器
在startContainer()代码中
def startContainer(): java.util.Map[String, ByteBuffer] = {
    // 容器环境初始化信息
    ......
    // 准备指令
    val commands = prepareCommand()
    ctx.setCommands(commands.asJava)
    ......

    // Send the start request to the ContainerManager
    try {
        //底层调用nmClient客户端向NodeManager启动容器, 执行脚本命令
      nmClient.startContainer(container.get, ctx)
    } catch {
      case ex: Exception =>
        throw new SparkException(s"Exception while starting container ${container.get.getId}" +
          s" on host $hostname", ex)
    }
}查询容器启动的相关命令信息,进入prepareCommand()方法 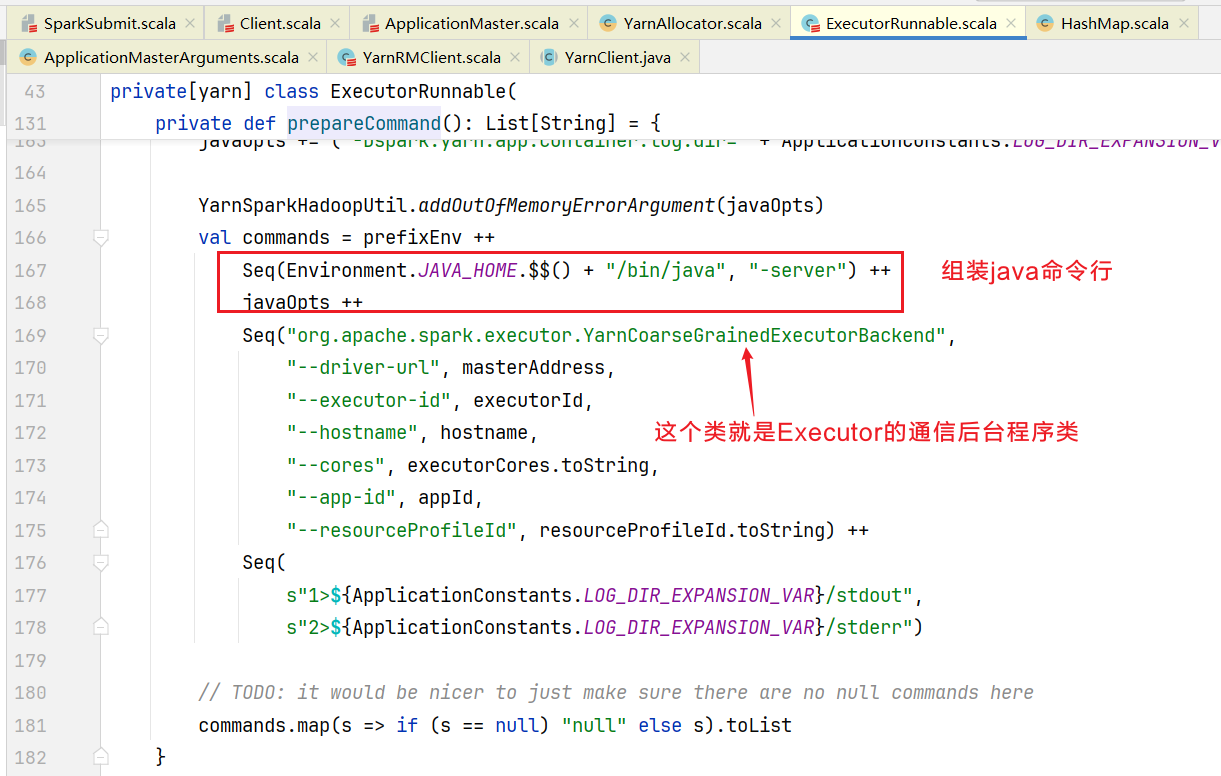
查看YarnCoarseGrainedExecutorBackend的main()方法
def main(args: Array[String]): Unit = {
    // createFn就是YarnCoarseGrainedExecutorBackend的对象实例创建函数
    val createFn: (RpcEnv, CoarseGrainedExecutorBackend.Arguments, SparkEnv, ResourceProfile) =>
      CoarseGrainedExecutorBackend = { case (rpcEnv, arguments, env, resourceProfile) =>
      new YarnCoarseGrainedExecutorBackend(rpcEnv, arguments.driverUrl, arguments.executorId,
        arguments.bindAddress, arguments.hostname, arguments.cores,
        env, arguments.resourcesFileOpt, resourceProfile)
    }
    val backendArgs = CoarseGrainedExecutorBackend.parseArguments(args,
      this.getClass.getCanonicalName.stripSuffix("$"))
    // 执行run方法
    CoarseGrainedExecutorBackend.run(backendArgs, createFn)
    System.exit(0)
}进入CoarseGrainedExecutorBackend的run()方法
def run(
      arguments: Arguments,
      backendCreateFn: (RpcEnv, Arguments, SparkEnv, ResourceProfile) =>
        CoarseGrainedExecutorBackend): Unit = {

    Utils.initDaemon(log)

    SparkHadoopUtil.get.runAsSparkUser { () =>
      // Debug code
      Utils.checkHost(arguments.hostname)

      // Bootstrap to fetch the driver's Spark properties.
      val executorConf = new SparkConf
      // 从通信环境中创建fetcher, 使用fetcher得到driver对象
      val fetcher = RpcEnv.create(
        "driverPropsFetcher",
        arguments.bindAddress,
        arguments.hostname,
        -1,
        executorConf,
        new SecurityManager(executorConf),
        numUsableCores = 0,
        clientMode = true)

      var driver: RpcEndpointRef = null
      val nTries = 3
      for (i <- 0 until nTries if driver == null) {
        try {
            // 得到driver
          driver = fetcher.setupEndpointRefByURI(arguments.driverUrl)
        } catch {
          case e: Throwable => if (i == nTries - 1) {
            throw e
          }
        }
      }
      ......

      driverConf.set(EXECUTOR_ID, arguments.executorId)
      // 创建spark的环境
      val env = SparkEnv.createExecutorEnv(driverConf, arguments.executorId, arguments.bindAddress,
        arguments.hostname, arguments.cores, cfg.ioEncryptionKey, isLocal = false)
      // Set the application attemptId in the BlockStoreClient if available.
      val appAttemptId = env.conf.get(APP_ATTEMPT_ID)
      appAttemptId.foreach(attemptId =>
        env.blockManager.blockStoreClient.setAppAttemptId(attemptId)
      )
      val backend = backendCreateFn(env.rpcEnv, arguments, env, cfg.resourceProfile)
      // 在通信环境中安装一个名叫"Executor"的终端(Endpoint),
      // 其中backend就是YarnCoarseGrainedExecutorBackend对象实例
      env.rpcEnv.setupEndpoint("Executor", backend)
      arguments.workerUrl.foreach { url =>
        env.rpcEnv.setupEndpoint("WorkerWatcher",
          new WorkerWatcher(env.rpcEnv, url, isChildProcessStopping = backend.stopping))
      }
      env.rpcEnv.awaitTermination()
    }
}那么如何注册安装的呢,进入setupEndpoint()方法,发现是一个抽象方法,查看具体实现类,可见底层通信使用的是Netty框架 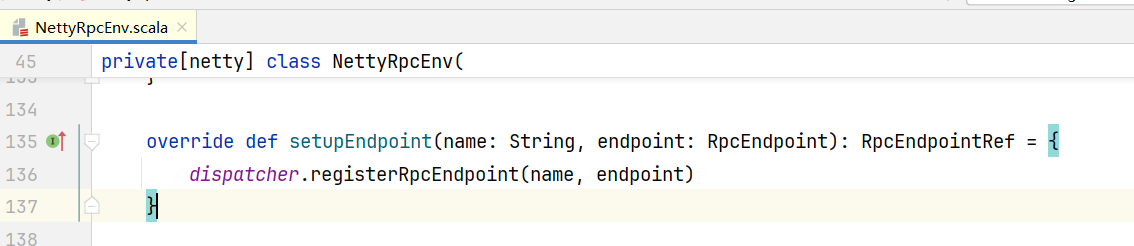 打开registerRpcEndpoint(),进入Dispatcher.scala代码中
 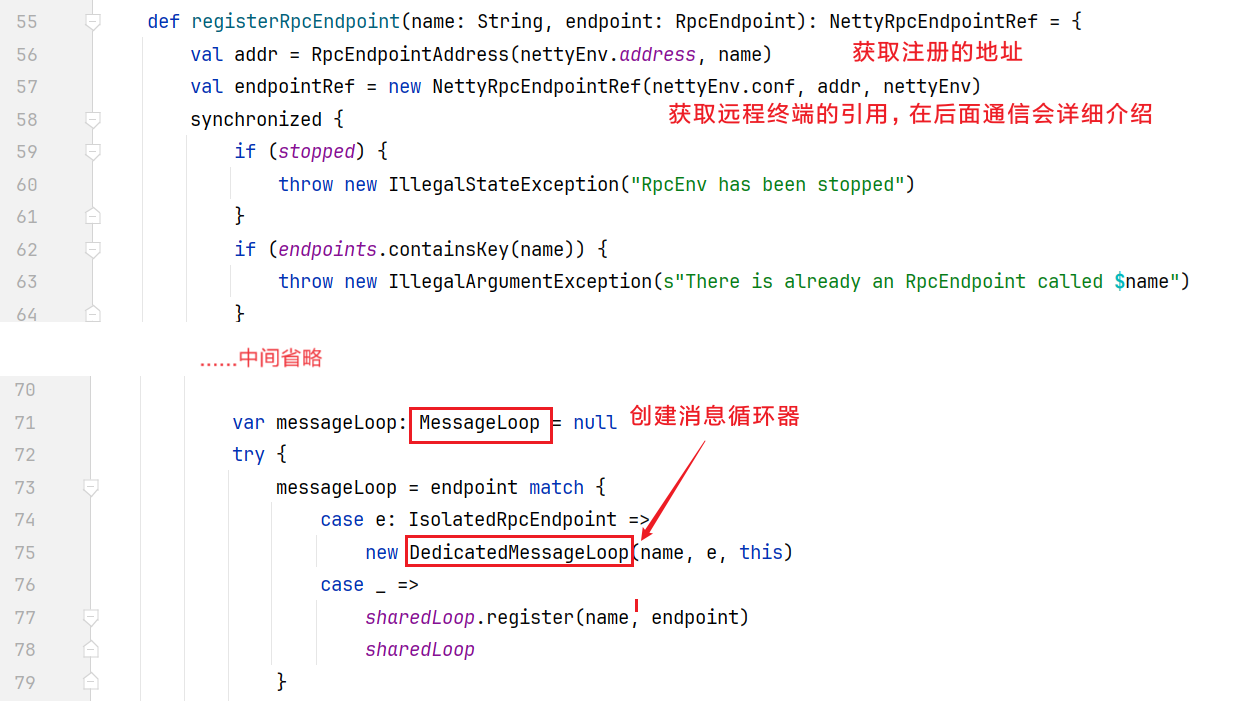 在DedicatedMessageLoop对象中,包含Inbox对象
 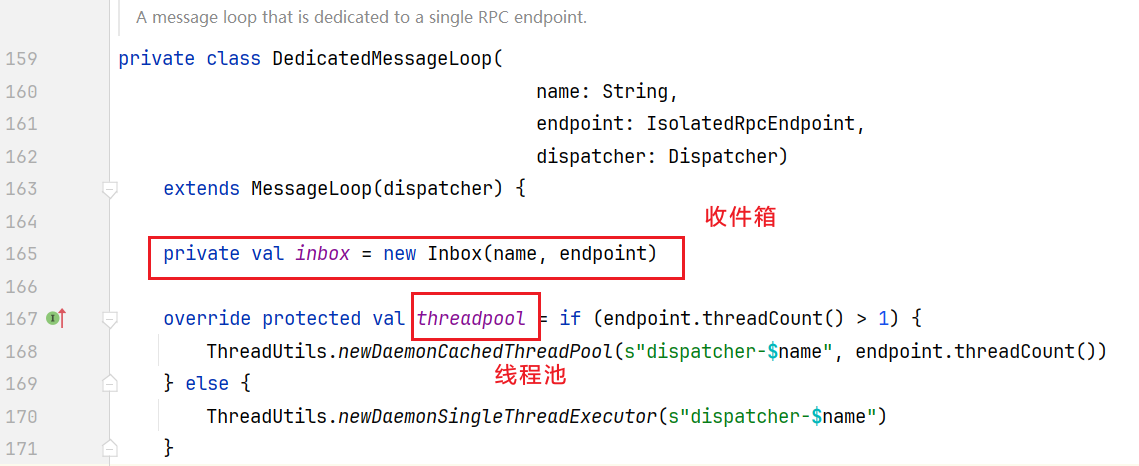 点击进入Inbox对象代码中
 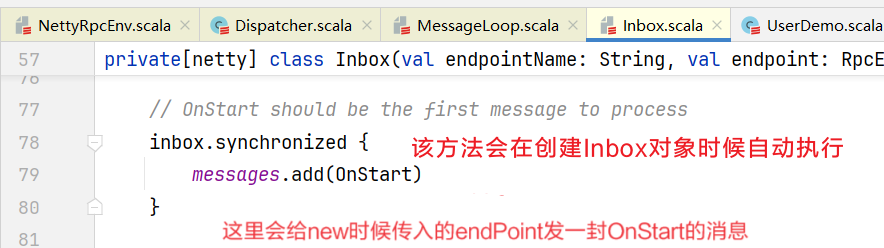 当前endpoint对象就是CoarseGrainedExecutorBackend类的实例,它是RPCEndPoint的子类,RPCEndPoint本身是有一个生命周期的概念:constructor -> onStart -> receive* -> onStop
 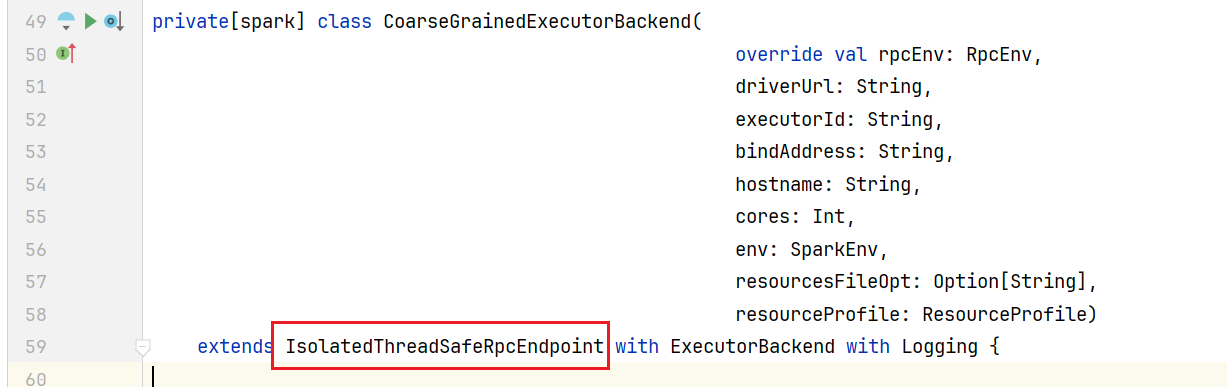 这时CoarseGrainedExecutorBackend收到OnStart就会遵循生命周期去调用onStart方法
override def onStart(): Unit = {
    ...... 代码省略
    rpcEnv.asyncSetupEndpointRefByURI(driverUrl).flatMap { ref =>
      // This is a very fast action so we can use "ThreadUtils.sameThread"
      // 得到Driver
      driver = Some(ref)
      env.executorBackend = Option(this)
      // 向连接Driver,发送内容是注册执行器(Executor)类型消息
      ref.ask[Boolean](RegisterExecutor(executorId, self, hostname, cores, extractLogUrls,
        extractAttributes, _resources, resourceProfile.id))
    }(ThreadUtils.sameThread).onComplete {
        // 如果返回注册成功消息,向自己发送已经注册执行器消息
      case Success(_) =>
        self.send(RegisteredExecutor)
      case Failure(e) =>
        exitExecutor(1, s"Cannot register with driver: $driverUrl", e, notifyDriver = false)
    }(ThreadUtils.sameThread)
}那Driver怎么收到的消息的呢,回到Driver的上下文对象SparkContxt中: 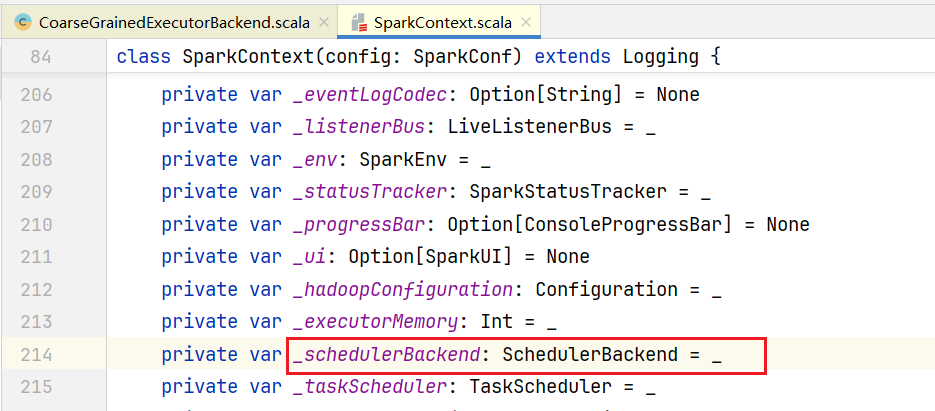 Driver这边也有一个类似的收发消息的终端服务,叫SchedulerBackend类,它是一个抽象类:
 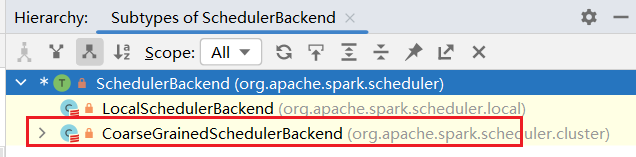 我们的Spark是部署的不是本地模式,查看CoarseGrainedSchedulerBackend.scala
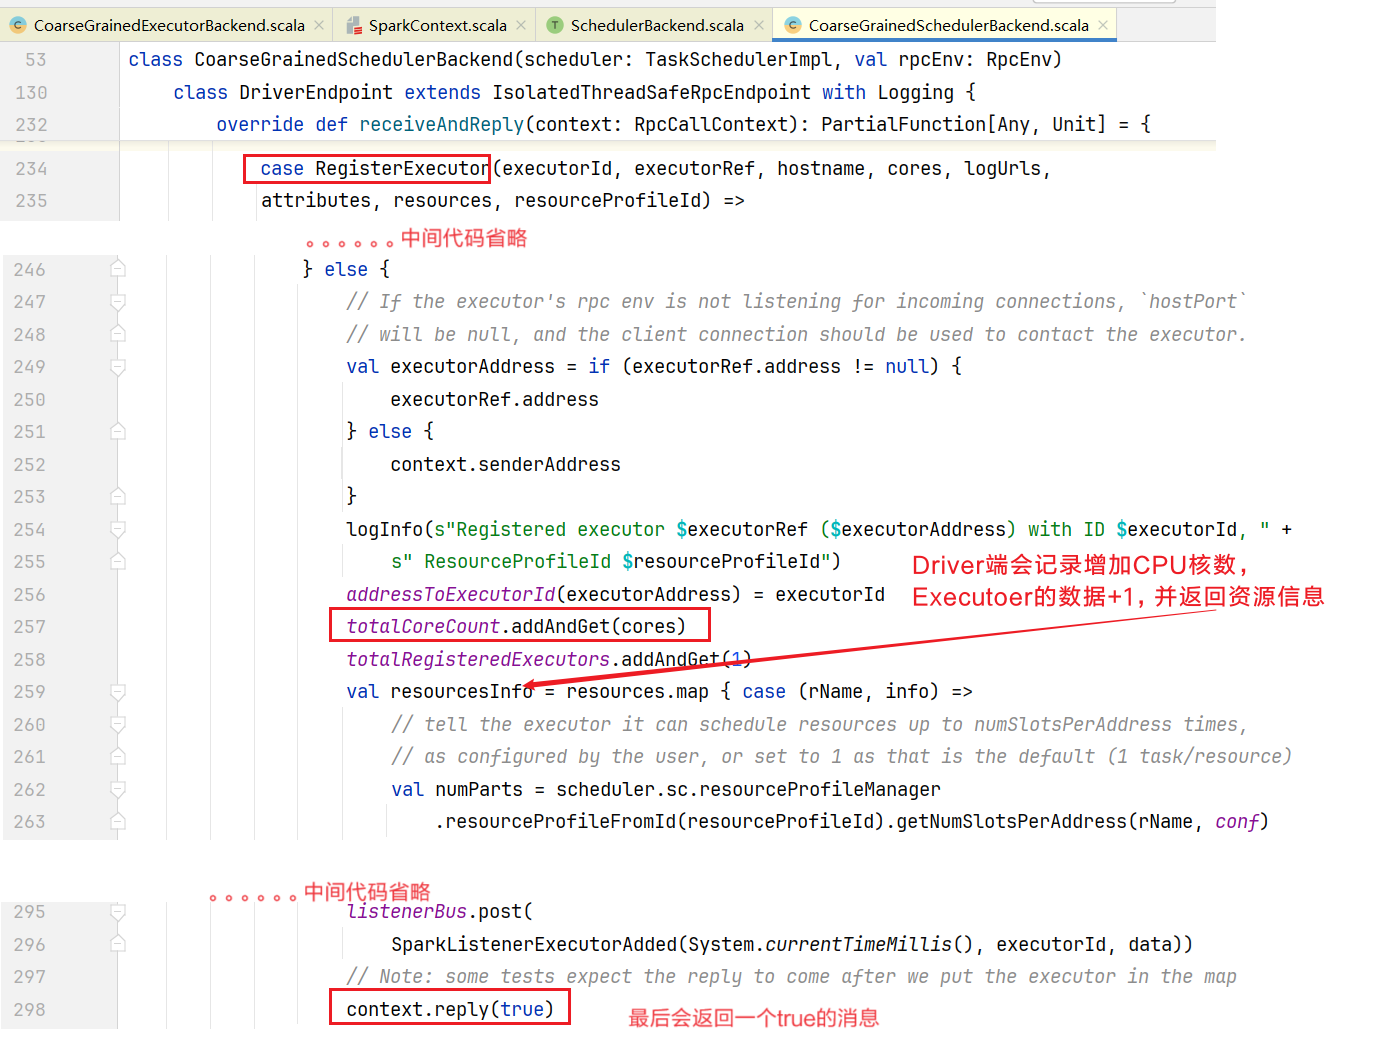
4. 启动Executor计算对象
Executor会往自己身上注册消息,回到CoarseGrainedExecutorBackend.scala中,查看receive方法: 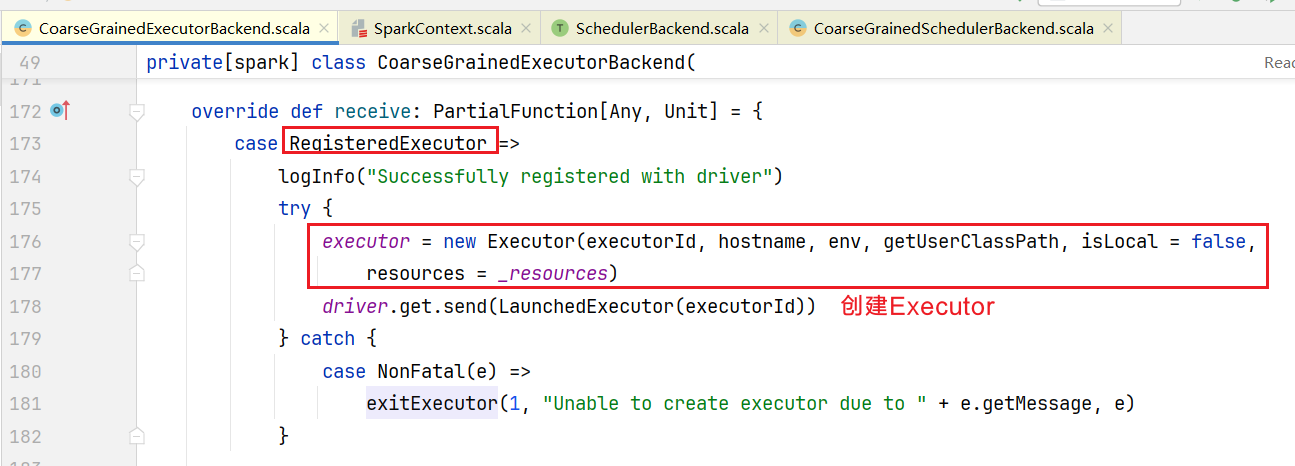 这是创建了真正的Executor计算对象,之前的Excutor只是负责后台通信。然后会向Driver发送LaunchedExecutor类型消息 在Driver端查看收到消息的处理逻辑:
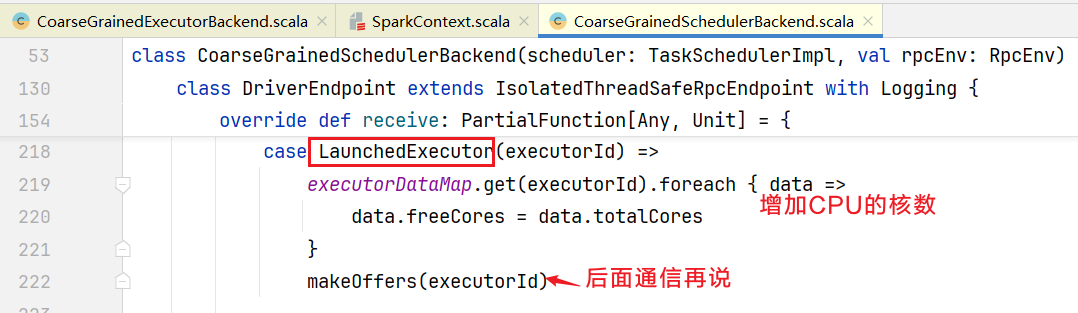 自此Executor节点也被分配启动了。