Hadoop集群搭建
Hadoop运行模式包括:本地模式、伪分布式模式以及完全分布式模式。
- 本地模式:单机运行,只是用来演示一下官方案例。生产环境不用。
- 伪分布式模式:也是单机运行,但是具备Hadoop集群的所有功能,一台服务器模拟一个分布式的环境。个别缺钱的公司用来测试,生产环境不用。
- 完全分布式模式:多台服务器组成分布式环境。生产环境使用。
1. 搭建完全分布式
需要提前设置主机域名解析配置,请参考配置主机名, 使得hadoop102~4分别和192.168.102~104映射上。
1.1 环境准备
- 在/home/jack/bin下面编写集群分发脚本:xsync.sh
#!/bin/bash

#1. 判断参数个数
if [ $# -lt 1 ]
then
    echo Not Enough Arguement!
    exit;
fi

#2. 遍历集群所有机器
for host in hadoop102 hadoop103 hadoop104
do
    echo ====================  $host  ====================
    #3. 遍历所有目录,挨个发送
    for file in $@
    do
        #4. 判断文件是否存在
        if [ -e $file ]
            then
                #5. 获取父目录
                pdir=$(cd -P $(dirname $file); pwd)

                #6. 获取当前文件的名称
                fname=$(basename $file)
                ssh $host "mkdir -p $pdir"
                rsync -av $pdir/$fname $host:$pdir
            else
                echo $file does not exists!
        fi
    done
done- 向集群分发/home/jack/bin文件夹
[jack@hadoop102 ~]$ xsync /home/jack/bin
==================== hadoop102 ====================
The authenticity of host 'hadoop102 (192.168.101.102)' can't be established.
ECDSA key fingerprint is SHA256:us4sVxAoXXqVPV9+1BBsB46h61l/zD4NG9LcayJZ90w.
ECDSA key fingerprint is MD5:01:18:59:c9:b4:48:be:01:22:9d:bd:1e:55:5c:54:75.
Are you sure you want to continue connecting (yes/no)? y
Please type 'yes' or 'no': yes
Warning: Permanently added 'hadoop102,192.168.101.102' (ECDSA) to the list of known hosts.
jack@hadoop102's password:
jack@hadoop102's password:
sending incremental file list

sent 92 bytes  received 17 bytes  31.14 bytes/sec
total size is 739  speedup is 6.78
==================== hadoop103 ====================
The authenticity of host 'hadoop103 (192.168.101.103)' can't be established.
ECDSA key fingerprint is SHA256:us4sVxAoXXqVPV9+1BBsB46h61l/zD4NG9LcayJZ90w.
ECDSA key fingerprint is MD5:01:18:59:c9:b4:48:be:01:22:9d:bd:1e:55:5c:54:75.
Are you sure you want to continue connecting (yes/no)? yes
Warning: Permanently added 'hadoop103,192.168.101.103' (ECDSA) to the list of known hosts.
Authentication failed.
jack@hadoop103's password:
sending incremental file list
bin/
bin/xsync

sent 877 bytes  received 39 bytes  166.55 bytes/sec
total size is 739  speedup is 0.81
==================== hadoop104 ====================
The authenticity of host 'hadoop104 (192.168.101.104)' can't be established.
ECDSA key fingerprint is SHA256:us4sVxAoXXqVPV9+1BBsB46h61l/zD4NG9LcayJZ90w.
ECDSA key fingerprint is MD5:01:18:59:c9:b4:48:be:01:22:9d:bd:1e:55:5c:54:75.
Are you sure you want to continue connecting (yes/no)? yes
Warning: Permanently added 'hadoop104,192.168.101.104' (ECDSA) to the list of known hosts.
jack@hadoop104's password:
jack@hadoop104's password:
sending incremental file list
bin/
bin/xsync

sent 877 bytes  received 39 bytes  261.71 bytes/sec
total size is 739 speedup is 0.81- SSH无密登录配置
## 生成公钥和私钥
[jack@hadoop102 .ssh]$ ssh-keygen -t rsa
Generating public/private rsa key pair.
Enter file in which to save the key (/home/jack/.ssh/id_rsa):
Enter passphrase (empty for no passphrase):
Enter same passphrase again:
Your identification has been saved in /home/jack/.ssh/id_rsa.
Your public key has been saved in /home/jack/.ssh/id_rsa.pub.
The key fingerprint is:
SHA256:68DFGLdSrm0jNs761dplyB0SQOsmC7vRK1ECuf97zZU jack@hadoop102
The key's randomart image is:
+---[RSA 2048]----+
|   .   .o        |
|  o      o       |
|   o  . + .      |
|  . . .O . .     |
|   ..o+ S . ..   |
|    o= O + +E.   |
|    ooX *o+.+    |
|    .*.O.+oo     |
|    o+*oo .      |
+----[SHA256]-----+

## 将公钥拷贝到要免密登录的目标机器上
[jack@hadoop102 .ssh]$ ssh-copy-id hadoop102
/usr/bin/ssh-copy-id: INFO: Source of key(s) to be installed: "/home/jack/.ssh/id_rsa.pub"
/usr/bin/ssh-copy-id: INFO: attempting to log in with the new key(s), to filter out any that are already installed
/usr/bin/ssh-copy-id: INFO: 1 key(s) remain to be installed -- if you are prompted now it is to install the new keys
jack@hadoop102's password:

Number of key(s) added: 1

Now try logging into the machine, with:   "ssh 'hadoop102'"
and check to make sure that only the key(s) you wanted were added.

[jack@hadoop102 .ssh]$ ssh-copy-id hadoop103

[jack@hadoop102 .ssh]$ ssh-copy-id hadoop104其中日志中的rsa也就是非对称加密,需要有公钥私钥,可以在.ssh文件夹目录下(~/.ssh)查看:
| 文件名 | 作用 |
|---|---|
| known_hosts | 记录ssh访问过计算机的公钥(public key) |
| id_rsa | 生成的私钥 |
| id_rsa.pub | 生成的公钥 |
| authorized_keys | 存放授权过的无密登录服务器公钥 |
2. 集群部署规划
- 集群部署规划
NameNode和SecondaryNameNode不要安装在同一台服务器。ResourceManager也很消耗内存,不要和NameNode、SecondaryNameNode配置在同一台机器上。
| 组件 | hadoop102 | hadoop103 | hadoop104 |
|---|---|---|---|
| HDFS | NameNode、DataNode | DataNode | SecondaryNameNode、DataNode |
| YARN | NodeManager | ResourceManager、NodeManager | NodeManager |
- 配置文件准备
默认配置文件
默认文件名 文件存放在Hadoop的jar包中的位置 [core-default.xml] hadoop-common-3.3.6.jar/core-default.xml [hdfs-default.xml] hadoop-hdfs-3.3.6.jar/hdfs-default.xml [yarn-default.xml] hadoop-yarn-common-3.3.6.jar/yarn-default.xml [mapred-default.xml] hadoop-mapreduce-client-core-3.3.6.jar/mapred-default.xml 自定义配置文件 core-site.xml、chdfs-site.xml、cyarn-site.xml、cmapred-site.xml四个配置文件存放在$HADOOP_HOME/etc/hadoop这个路径上,用户可以根据项目需求重新进行修改配置。
- 配置集群
<?xml version="1.0" encoding="UTF-8"?>
<?xml-stylesheet type="text/xsl" href="configuration.xsl"?>
<configuration>
    <!-- 指定NameNode的地址 -->
    <property>
        <name>fs.defaultFS</name>
        <value>hdfs://hadoop102:8020</value>
    </property>
    <!-- 指定hadoop数据的存储目录 -->
    <property>
        <name>hadoop.tmp.dir</name>
        <value>/opt/module/hadoop-3.3.6/data</value>
    </property>
    <!-- 配置HDFS网页登录使用的静态用户为jack -->
    <property>
        <name>hadoop.http.staticuser.user</name>
        <value>jack</value>
    </property>
</configuration><?xml version="1.0" encoding="UTF-8"?>
<?xml-stylesheet type="text/xsl" href="configuration.xsl"?>
<configuration>
<!-- nn web端访问地址-->
<property>
<name>dfs.namenode.http-address</name>
<value>hadoop102:9870</value>
</property>
<!-- 2nn web端访问地址-->
<property>
<name>dfs.namenode.secondary.http-address</name>
<value>hadoop104:9868</value>
</property>
</configuration><?xml version="1.0"?>
<configuration>
<!-- 指定MR走shuffle -->
<property>
<name>yarn.nodemanager.aux-services</name>
<value>mapreduce_shuffle</value>
</property>
<!-- 指定ResourceManager的地址-->
<property>
<name>yarn.resourcemanager.hostname</name>
<value>hadoop103</value>
</property>
<property>
<name>yarn.application.classpath</name>
<!-- 命令行下输入hadoop classpath返回的内容就是Hadoop classpath路径 -->
<value>输入刚才返回的Hadoop classpath路径</value>
</property>
</configuration><?xml version="1.0"?>
<?xml-stylesheet type="text/xsl" href="configuration.xsl"?>
<configuration>
<!-- 指定MapReduce程序运行在Yarn上 -->
<property>
<name>mapreduce.framework.name</name>
<value>yarn</value>
</property>
</configuration>- 配置hadoop_env.sh
如果是JDK11以上版本,需要配置java虚拟机启动参数:
vim /opt/module/hadoop-3.4.1/etc/hadoop/hadoop-env.sh
## 添加内容如下,不然Yarn启动不了
export HADOOP_OPTS="--add-opens java.base/java.lang=ALL-UNNAMED"3. 关闭防火墙
#配置防火墙
[jack@hadoop102 bin]$ sudo systemctl stop firewalld
[jack@hadoop102 bin]$ sudo systemctl disable firewalld.service
Removed symlink /etc/systemd/system/multi-user.target.wants/firewalld.service.
Removed symlink /etc/systemd/system/dbus-org.fedoraproject.FirewallD1.service.4. 启动集群
- /opt/module/hadoop-3.3.6/etc/hadoop/workers
里面配置不能有空格空行
[jack@hadoop102 hadoop]$ cat workers
hadoop102
hadoop103
hadoop104
## 分发works
[jack@hadoop102 hadoop]$ xsync workers
==================== hadoop103 ====================
sending incremental file list
workers

sent 135 bytes  received 41 bytes  352.00 bytes/sec
total size is 30  speedup is 0.17
==================== hadoop104 ====================
sending incremental file list
workers

sent 135 bytes  received 41 bytes  352.00 bytes/sec
total size is 30 speedup is 0.17- 启动集群
- 如果集群是第一次启动,需要在hadoop102节点格式化NameNode
警告
格式化NameNode,会产生新的集群id,但如果已经不是第一次启动,会导致NameNode和DataNode的集群id不一致,故而集群找不到已往数据。 另外如果集群在运行过程中报错,解决办法是需要重新格式化NameNode的话,一定要先停止NameNode和DataNode进程,并且要删除所有机器的data和logs目录,然后再进行格式化NameNode。
[jack@hadoop102 hadoop]$ hdfs namenode -format
WARNING: /opt/module/hadoop-3.3.6/logs does not exist. Creating.
2024-01-15 21:26:17,517 INFO namenode.NameNode: STARTUP_MSG:
/************************************************************
STARTUP_MSG: Starting NameNode
STARTUP_MSG:   host = hadoop102/192.168.101.102
STARTUP_MSG:   args = [-format]
STARTUP_MSG:   version = 3.3.6
......- 启动HDFS
[jack@hadoop102 hadoop-3.3.6]$ ./sbin/start-dfs.sh
Starting namenodes on [hadoop102]
Starting datanodes
hadoop104: WARNING: /opt/module/hadoop-3.3.6/logs does not exist. Creating.
hadoop103: WARNING: /opt/module/hadoop-3.3.6/logs does not exist. Creating.
Starting secondary namenodes [hadoop104]- 启动YARN
[jack@hadoop102 hadoop-3.3.6]$ ./sbin/start-yarn.sh
Starting resourcemanager
Starting nodemanagers危险
NameNode和ResourceManger如果不是同一台机器,不能在NameNode上启动 YARN,应该在ResouceManager所在的机器上启动YARN。
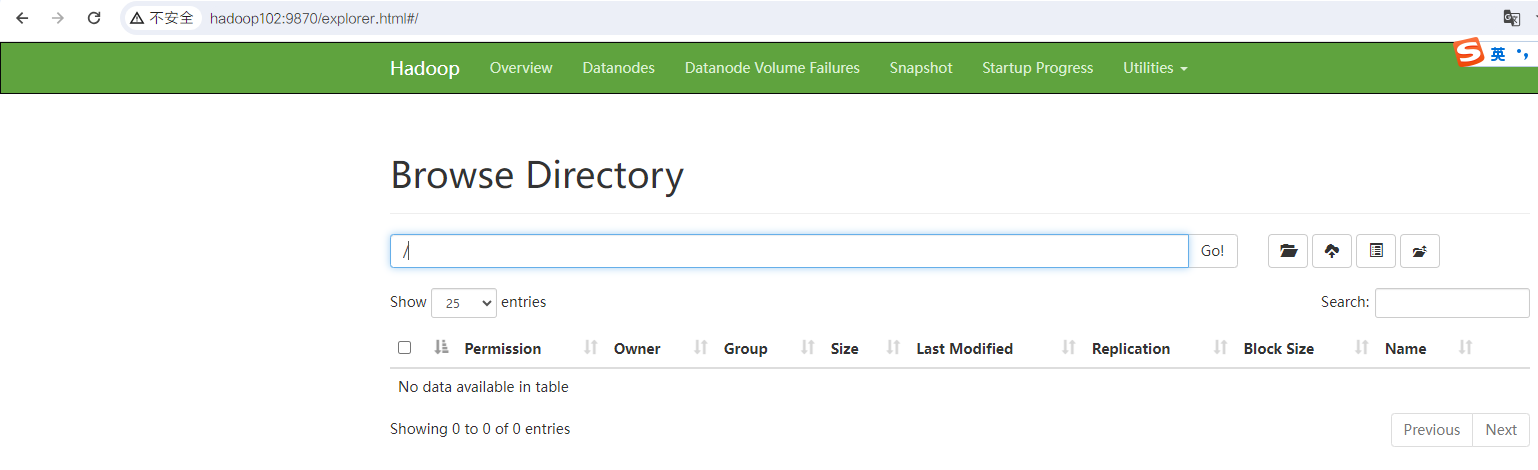
- Web端查看NameNode
- 浏览器中输入:http://hadoop102:9870
- 查看HDFS上存储的数据信息
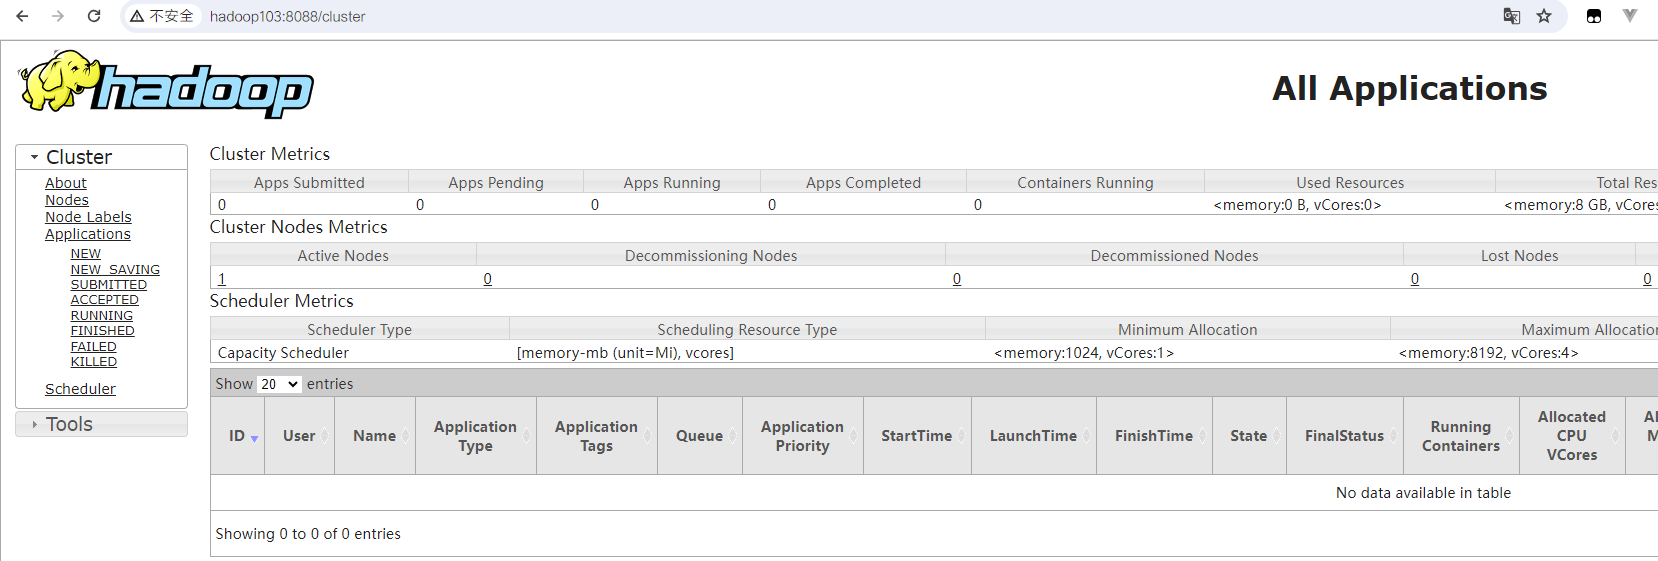
- Web端查看YARN的ResourceManager
- 浏览器中输入:http://hadoop103:8088
- 查看YARN上运行的Job信息
5. 集群测试
## 创建文件夹
[jack@hadoop103 ~]$ hdfs fs -mkdir -p /user/jack/input
## 上传大文件
[jack@hadoop103 hadoop-3.3.6]$ hadoop fs -put /opt/software/webserver.log /user/jack/input/
## 查看上传的文件
[jack@hadoop104 subdir0]$ ll /opt/module/hadoop-3.3.6/data/dfs/data/current/BP-1056434405-192.168.101.102-1705325179904/current/finalized/subdir0/subdir0
总用量 51608
-rw-rw-r--. 1 jack jack 52429535 1月  16 16:27 blk_1073741828
-rw-rw-r--. 1 jack jack   409615 1月  16 16:27 blk_1073741828_1004.meta
## 执行wordcount程序计算
[jack@hadoop104 subdir0]$ hadoop jar /opt/module/hadoop-3.3.6/share/hadoop/mapreduce/hadoop-mapreduce-examples-3.3.6.jar wordcount /user/jack/input/webserver.log /user/jack/output4/
2024-01-16 18:09:43,365 INFO client.DefaultNoHARMFailoverProxyProvider: Connecting to ResourceManager at hadoop103/192.168.101.103:8032
2024-01-16 18:09:44,390 INFO mapreduce.JobResourceUploader: Disabling Erasure Coding for path: /tmp/hadoop-yarn/staging/jack/.staging/job_1705399039702_0004
2024-01-16 18:09:44,924 INFO input.FileInputFormat: Total input files to process : 1
2024-01-16 18:09:45,069 INFO mapreduce.JobSubmitter: number of splits:1
2024-01-16 18:09:45,461 INFO mapreduce.JobSubmitter: Submitting tokens for job: job_1705399039702_0004
2024-01-16 18:09:45,461 INFO mapreduce.JobSubmitter: Executing with tokens: []
2024-01-16 18:09:45,765 INFO conf.Configuration: resource-types.xml not found
2024-01-16 18:09:45,765 INFO resource.ResourceUtils: Unable to find 'resource-types.xml'.
2024-01-16 18:09:45,882 INFO impl.YarnClientImpl: Submitted application application_1705399039702_0004
2024-01-16 18:09:45,938 INFO mapreduce.Job: The url to track the job: http://hadoop103:8088/proxy/application_1705399039702_0004/
2024-01-16 18:09:45,939 INFO mapreduce.Job: Running job: job_1705399039702_0004
2024-01-16 18:10:00,502 INFO mapreduce.Job: Job job_1705399039702_0004 running in uber mode : false
2024-01-16 18:10:00,509 INFO mapreduce.Job:  map 0% reduce 0%
2024-01-16 18:10:16,798 INFO mapreduce.Job:  map 100% reduce 0%
2024-01-16 18:10:25,915 INFO mapreduce.Job:  map 100% reduce 100%
2024-01-16 18:10:25,924 INFO mapreduce.Job: Job job_1705399039702_0004 completed successfully
2024-01-16 18:10:26,075 INFO mapreduce.Job: Counters: 54
    File System Counters
        FILE: Number of bytes read=557030
        FILE: Number of bytes written=1388685
        FILE: Number of read operations=0
        FILE: Number of large read operations=0
        FILE: Number of write operations=0
        HDFS: Number of bytes read=52429651
        HDFS: Number of bytes written=206962
        HDFS: Number of read operations=8
        HDFS: Number of large read operations=0
        HDFS: Number of write operations=2
        HDFS: Number of bytes read erasure-coded=0
    Job Counters
        Launched map tasks=1
        Launched reduce tasks=1
        Data-local map tasks=1
        Total time spent by all maps in occupied slots (ms)=13118
        Total time spent by all reduces in occupied slots (ms)=6814
        Total time spent by all map tasks (ms)=13118
        Total time spent by all reduce tasks (ms)=6814
        Total vcore-milliseconds taken by all map tasks=13118
        Total vcore-milliseconds taken by all reduce tasks=6814
        Total megabyte-milliseconds taken by all map tasks=13432832
        Total megabyte-milliseconds taken by all reduce tasks=6977536
    Map-Reduce Framework
        Map input records=709258
        Map output records=1926307
        Map output bytes=59521973
        Map output materialized bytes=278512
        Input split bytes=116
        Combine input records=1926307
        Combine output records=17077
        Reduce input groups=17006
        Reduce shuffle bytes=278512
        Reduce input records=17077
        Reduce output records=17006
        Spilled Records=51231
        Shuffled Maps =1
        Failed Shuffles=0
        Merged Map outputs=1
        GC time elapsed (ms)=483
        CPU time spent (ms)=6500
        Physical memory (bytes) snapshot=310816768
        Virtual memory (bytes) snapshot=5484998656
        Total committed heap usage (bytes)=142036992
        Peak Map Physical memory (bytes)=197545984
        Peak Map Virtual memory (bytes)=2740338688
        Peak Reduce Physical memory (bytes)=113270784
        Peak Reduce Virtual memory (bytes)=2744659968
    Shuffle Errors
        BAD_ID=0
        CONNECTION=0
        IO_ERROR=0
        WRONG_LENGTH=0
        WRONG_MAP=0
        WRONG_REDUCE=0
    File Input Format Counters
        Bytes Read=52429535
    File Output Format Counters
Bytes Written=2069626. 配置历史服务器
- 配置mapred-site.xml
vi mapred-site.xml在该文件里面增加如下配置:
<!-- 历史服务器端地址 -->
<property>
    <name>mapreduce.jobhistory.address</name>
    <value>hadoop102:10020</value>
</property>

<!-- 历史服务器web端地址 -->
<property>
    <name>mapreduce.jobhistory.webapp.address</name>
    <value>hadoop102:19888</value>
</property>- 在hadoop102启动历史服务器
[jack@hadoop102 bin]$ mapred --daemon start historyserver
[jack@hadoop102 bin]$ jps
2596 NameNode
4773 Jps
2710 DataNode
4745 JobHistoryServer访问JobHistory:
http://hadoop102:19888/jobhistory
7. 配置日志聚集
日志聚集概念:应用运行完成以后,将程序运行日志信息上传到HDFS系统上。  日志聚集功能好处:可以方便的查看到程序运行详情,方便开发调试。
提示
注意:开启日志聚集功能,需要重新启动NodeManager 、ResourceManager和HistoryServer。
- 配置yarn-site.xml
<!-- 开启日志聚集功能 -->
<property>
    <name>yarn.log-aggregation-enable</name>
    <value>true</value>
</property>
<!-- 设置日志聚集服务器地址 -->
<property>
    <name>yarn.log.server.url</name>
    <value>http://hadoop102:19888/jobhistory/logs</value>
</property>
<!-- 设置日志保留时间为7天 -->
<property>
    <name>yarn.log-aggregation.retain-seconds</name>
    <value>604800</value>
</property>- 重启NodeManager 、ResourceManager和HistoryServer
## 在hadoop102上停止historyserver
[jack@hadoop102 current]$ mapred --daemon stop historyserver
## 在hadoop103上停止和启动yarn
[jack@hadoop103 hadoop-3.3.6]$ sbin/stop-yarn.sh
Stopping nodemanagers
Stopping resourcemanager
[jack@hadoop103 hadoop-3.3.6]$ sbin/start-yarn.sh
## 在hadoop102上启动historyserver
[jack@hadoop102 current]$ mapred --daemon start historyserver8. 集群时间同步
- 如果服务器在公网环境(能连接外网),可以不采用集群时间同步,因为服务器会定期和公网时间进行校准;
- 如果服务器在内网环境,必须要配置集群时间同步,否则时间久了,会产生时间偏差,导致集群执行任务时间不同步。
- 查看所有节点ntpd服务状态和开机自启动状态
[jack@hadoop102 ~]$ sudo systemctl status ntpd- 修改hadoop102的ntp.conf配置文件
[jack@hadoop102 ~]$ vim /etc/ntp.conf添加下面内容
# 授权192.168.101.0-192.168.101.255网段上的所有机器可以从这台机器上查询和同步时间
restrict 192.168.10.0 mask 255.255.255.0 nomodify notrap
# 当该节点丢失网络连接,依然可以采用本地时间作为时间服务器为集群中的其他节点提供时间同步
server 127.127.1.0
fudge 127.127.1.0 stratum 10注释下面内容
# 不获取其他互联网上的时间
#server 0.centos.pool.ntp.org iburst
#server 1.centos.pool.ntp.org iburst
#server 2.centos.pool.ntp.org iburst
#server 3.centos.pool.ntp.org iburst- 修改hadoop102的/etc/sysconfig/ntpd 文件
[jack@hadoop102 ~]$ sudo vim /etc/sysconfig/ntpd增加内容如下
SYNC_HWCLOCK=yes- 重新启动ntpd服务并开机自启
[jack@hadoop102 ~]$ sudo systemctl start ntpd
[jack@hadoop102 ~]$ sudo systemctl enable ntpd- 其他机器配置
- 关闭所有节点上ntp服务和自启动
[jack@hadoop102 ~]$ sudo systemctl stop ntpd
[jack@hadoop102 ~]$ sudo systemctl disable ntpd- 在其他机器配置1分钟与时间服务器同步一次
[jack@hadoop102 ~]$ sudo crontab -e
## 编写定时任务如下:
*/1 * * * * /usr/sbin/ntpdate hadoop102