Gitlab搭建
前面给大家讲解的都是如何使用第三方代码托管平台来管理咱们的代码库。那么我们自己搭建一个这样的平台行不行呢?其实咱们之前已经用Git软件搭建了一个远程版本库,但是功能相对来讲,比较单一,而且操作起来也不像GitHub,Gitee平台那样更加人性化,所以我们这里介绍一个Gitab软件,用于搭建自己的代码托管平台。
1. Gitlab介绍
GitLab是由GitLabInc公司开发,使用MIT许可证的基于网络的Git仓库管理工具,且具有wiki和issue跟踪功能。使用Git作为代码管理工具,并在此基础上搭建起来的Web服务。GitLab被IBM,Sony,JulichResearchCenter,NASA,Alibab,Imvincea,O'ReillyMedia,Leibniz-Rechenzentrum(LRZ),CERN,SpaceX等组织使用。
目前Gitlab最新版本是17.3,但是最新版本的IDEA2024的Gitlab插件只适配了Gitlab15.x,所以本笔记安装选择Gitlab15(Gitlab17主要是UI调整和加入安全特性,实现DevOps=>DevSecOps), Gitlab17的主要功能和Gitlab15之间区别不大。
2. GitLab软件下载
官网地址:https://packages.gitlab.com/gitlab/gitlab-ce 或者访问中国Gitlab极狐的安装包网址:https://packages.gitlab.cn/, 这里使用官网Gitlab网站。 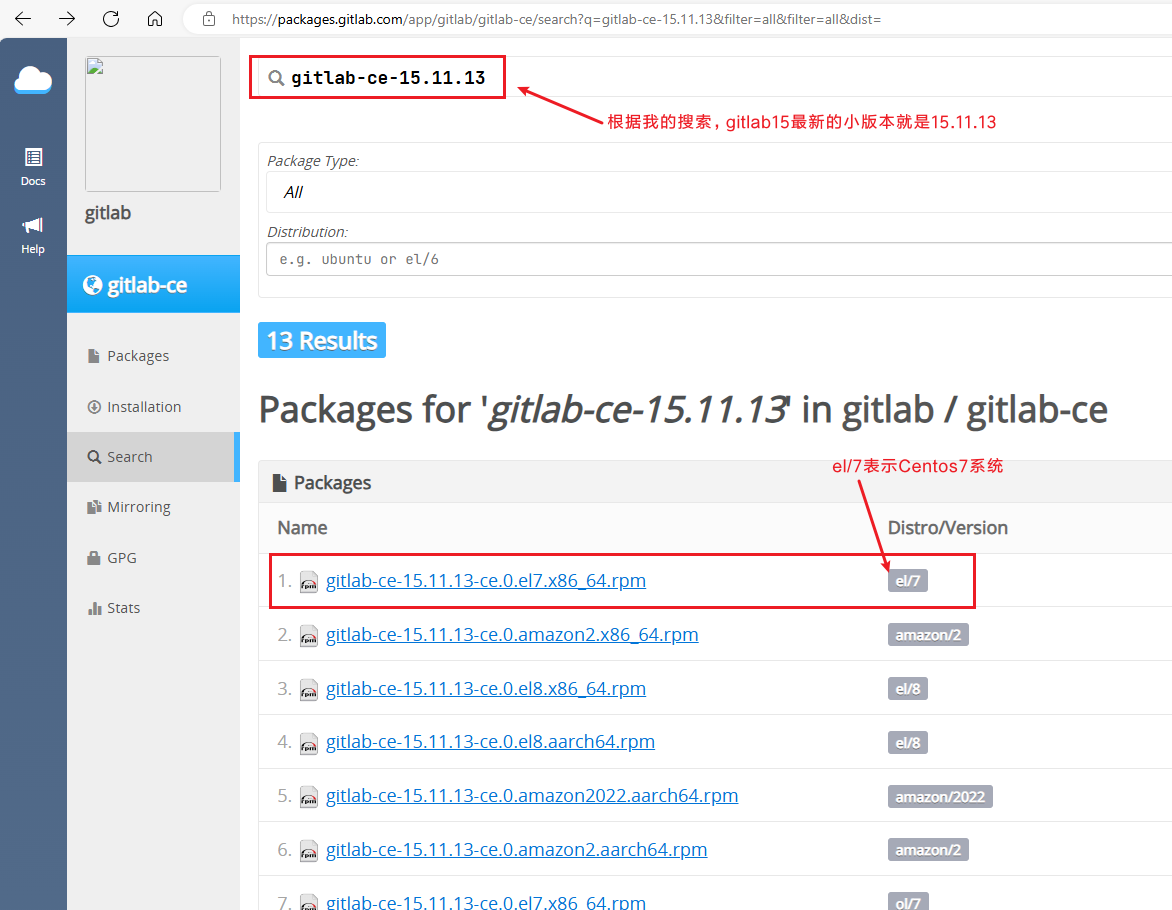 选择gitlab-ce-15.11.13-ce.0.el7.x86_64.rpm后,进入安装包说明页面:
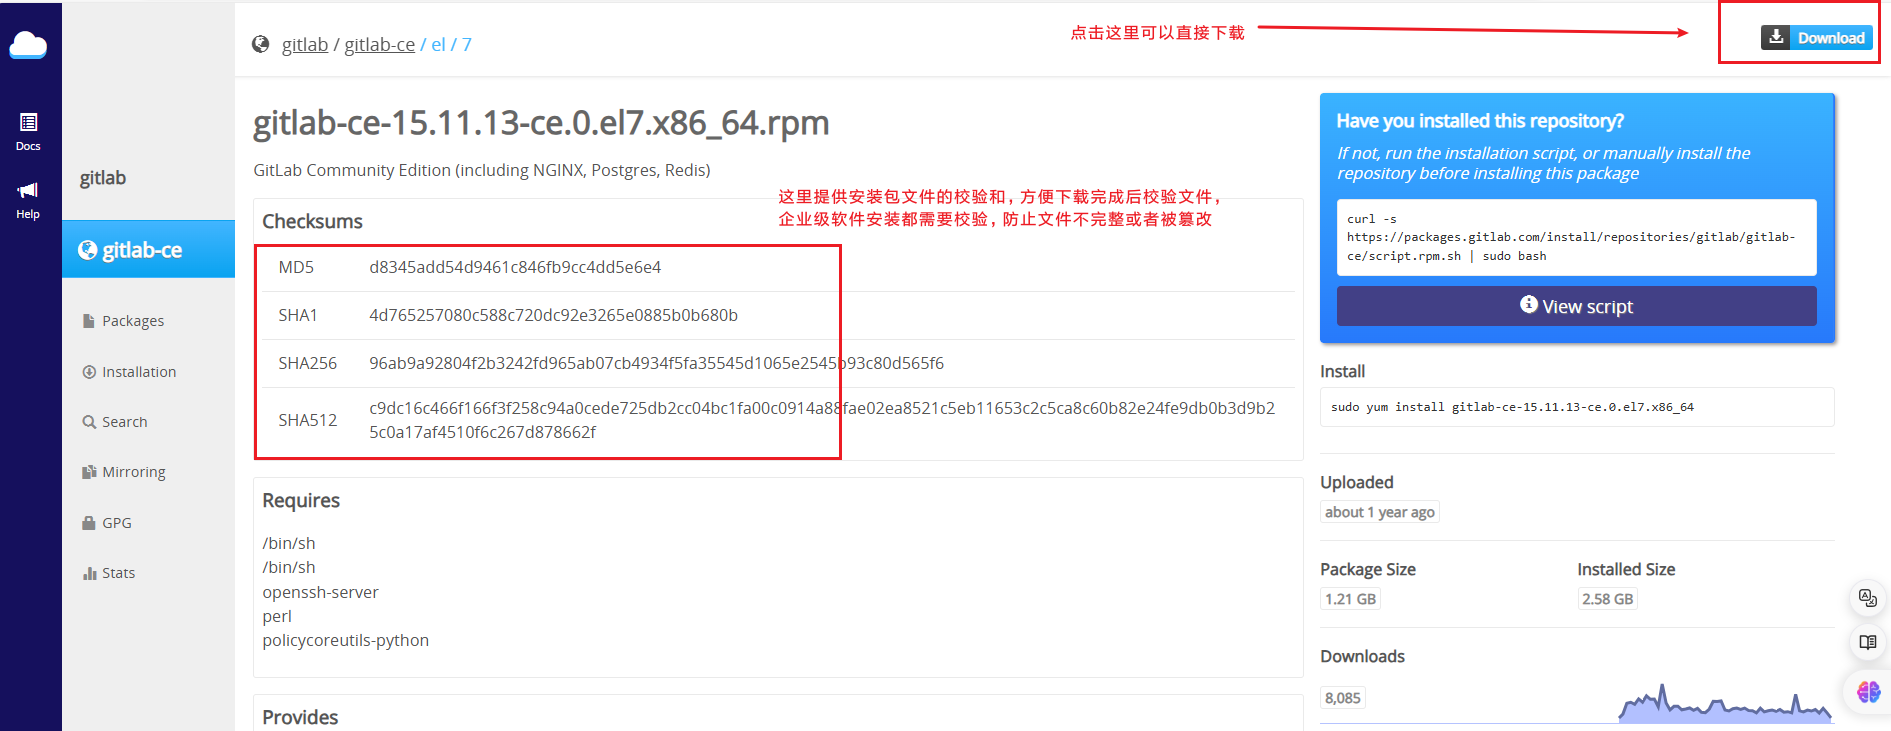
提示
直接在页面下载的文件大小超过300M,建议下载完成后都校验一下SHA-1,保证安装包完整可用。
3. 安装GitLab
将gitlab-ce安装包上传到centos7服务器的/opt/software/目录下
[jack@hadoop102 software]$ ll
总用量 1410528
-rw-rw-r--. 1 jack jack 1302487156 8月   4 01:10 gitlab-ce-15.11.13-ce.0.el7.x86_64.rpm
-rw-rw-r--. 1 jack jack 141887242 8月 3 21:04 jdk-8u391-linux-x64.tar.gz3.1 安装配置依赖项
[jack@hadoop102 software]$ sudo yum install curl policycoreutils-python openssh-server perl
[jack@hadoop102 software]$ sudo firewall-cmd --permanent --add-service=http
[jack@hadoop102 software]$ sudo firewall-cmd --permanent --add-service=https
[jack@hadoop102 software]$ sudo systemctl reload firewalld3.2 执行安装
[jack@hadoop102 software]$ sudo rpm -ivh gitlab-ce-15.11.13-ce.0.el7.x86_64.rpm
警告:gitlab-ce-15.11.13-ce.0.el7.x86_64.rpm: 头V4 RSA/SHA1 Signature, 密钥 ID f27eab47: NOKEY
准备中...                          ################################# [100%]
正在升级/安装...
   1:gitlab-ce-15.11.13-ce.0.el7      ################################# [100%]
It looks like GitLab has not been configured yet; skipping the upgrade script.

       *.                  *.
      ***                 ***
     *****               *****
    .******             *******
    ********            ********
   ,,,,,,,,,***********,,,,,,,,,
  ,,,,,,,,,,,*********,,,,,,,,,,,
  .,,,,,,,,,,,*******,,,,,,,,,,,,
      ,,,,,,,,,*****,,,,,,,,,.
         ,,,,,,,****,,,,,,
            .,,,***,,,,
                ,*,.

     _______ __  __          __
    / ____(_) /_/ /   ____ _/ /_
   / / __/ / __/ /   / __ `/ __ \
  / /_/ / / /_/ /___/ /_/ / /_/ /
  \____/_/\__/_____/\__,_/_.___/

Thank you for installing GitLab!
GitLab was unable to detect a valid hostname for your instance.
Please configure a URL for your GitLab instance by setting `external_url`
configuration in /etc/gitlab/gitlab.rb file.
Then, you can start your GitLab instance by running the following command:
  sudo gitlab-ctl reconfigure

For a comprehensive list of configuration options please see the Omnibus GitLab readme
https://gitlab.com/gitlab-org/omnibus-gitlab/blob/master/README.md

Help us improve the installation experience, let us know how we did with a 1 minute survey:
https://gitlab.fra1.qualtrics.com/jfe/form/SV_6kVqZANThUQ1bZb?installation=omnibus&release=15-114. 初始化Gitlab
#配置软件镜像
[jack@hadoop102 software]$ curl fsSL https://packages.gitlab.cn/repository/raw/scripts/setup.sh | sudo /bin/bash
# 安装
[jack@hadoop102 software]$ sudo EXTERNAL_URL="https://hadoop102" yum install -y gitlab-ce
# 初始化,这一步比较耗时
[jack@hadoop102 software]$ sudo gitlab-ctl reconfigure初始化完成时,控制台提示密码放在 /etc/gitlab/initial_root_password中 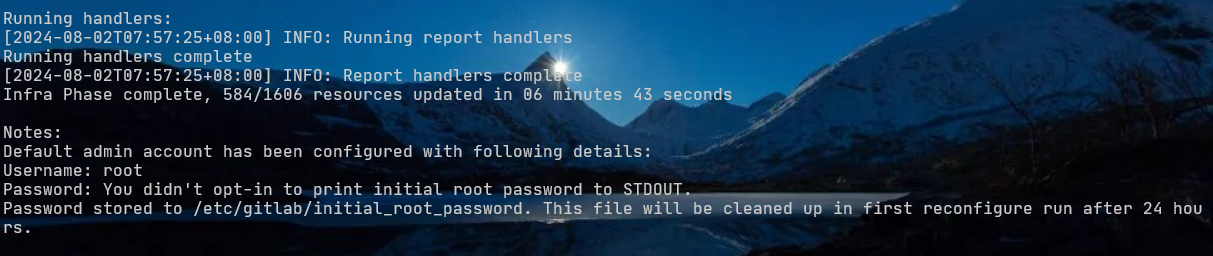
5. 启动Gitlab
# 启动
[jack@hadoop102 software]$ sudo gitlab-ctl start
# 停止
[jack@hadoop102 software]$ sudo gitlab-ctl stop6. 访问Gitlab
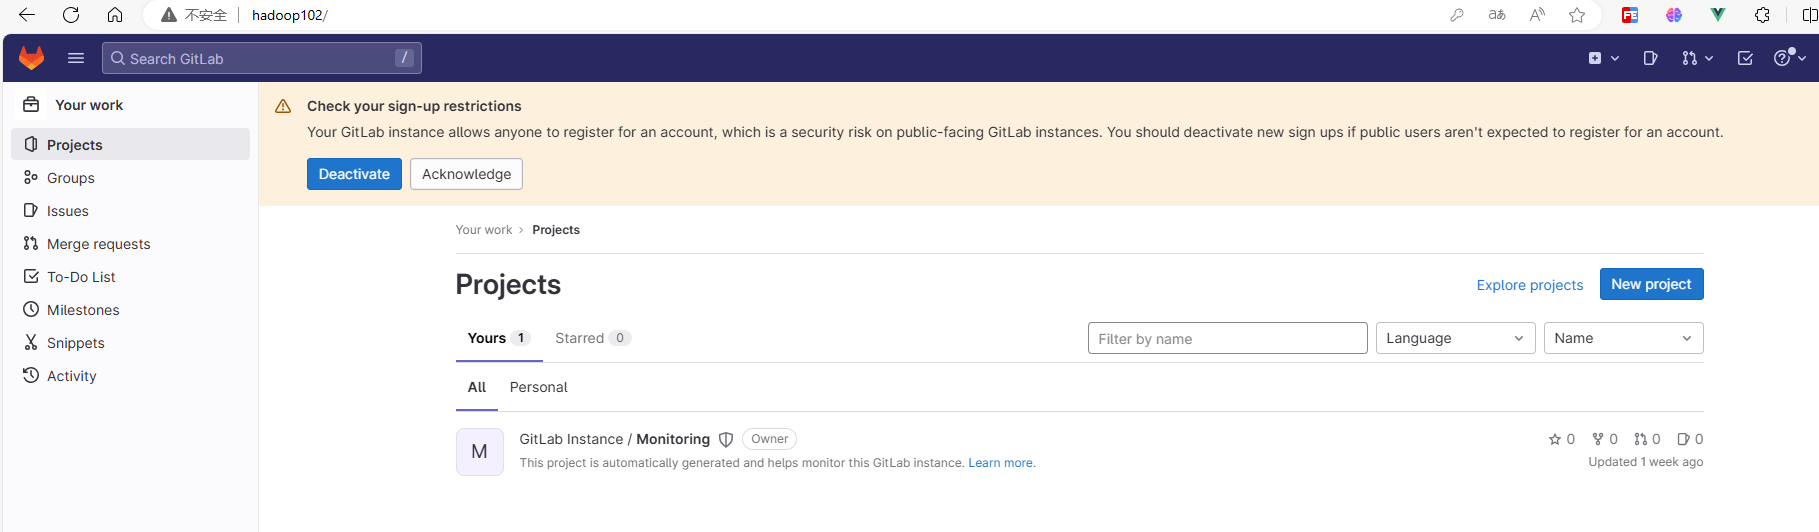
6.1 登录Gitlab
使用浏览器访问Gitlab,打开网址:http://hadoop102, 页面提示需要登录,而在初始化时,软件会提供默认管理员账户:root,但是密码是随机生成的。根据提示, 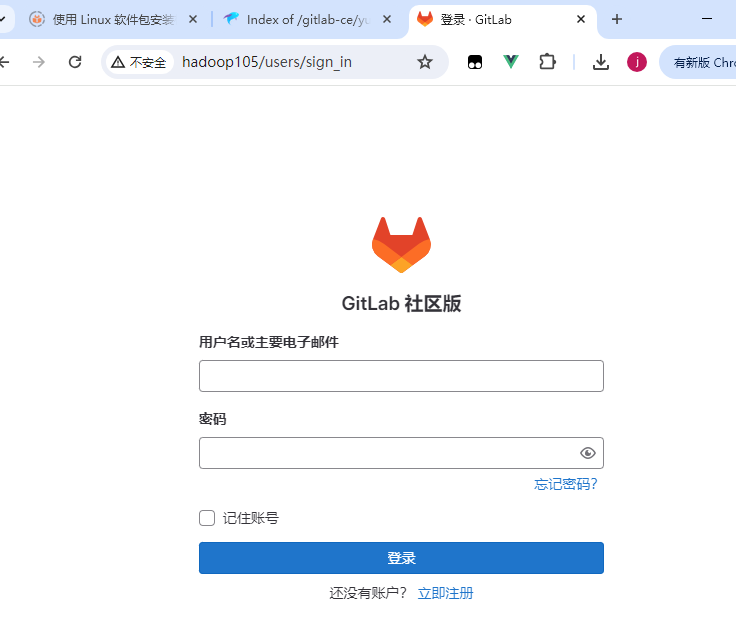 在/etc/gitlab/initial_root_password文件中查看密码
[jack@hadoop102 software]$ sudo cat  /etc/gitlab/initial_root_password
# WARNING: This value is valid only in the following conditions
#          1. If provided manually (either via `GITLAB_ROOT_PASSWORD` environment variable or via `gitlab_rails['initial_root_password']` setting in `gitlab.rb`, it was provided before database was seeded for the first time (usually, the first reconfigure run).
#          2. Password hasn't been changed manually, either via UI or via command line.
#
#          If the password shown here doesn't work, you must reset the admin password following https://docs.gitlab.com/ee/security/reset_user_password.html#reset-your-root-password.

Password: roCTCNDrXyrNpVM2p4ywXhWYuJLycxrqKmhfTWYxepQ=

# NOTE: This file will be automatically deleted in the first reconfigure run after 24 hours.输入用户名密码登录后,进入Gitlab首页: