常用软件安装
1. 安装tomcat
1.1 搜索镜像
由于https://hub.docker.com 网站已经被禁,在线搜索可以选用国内的一些网址比如https://docker.aityp.com: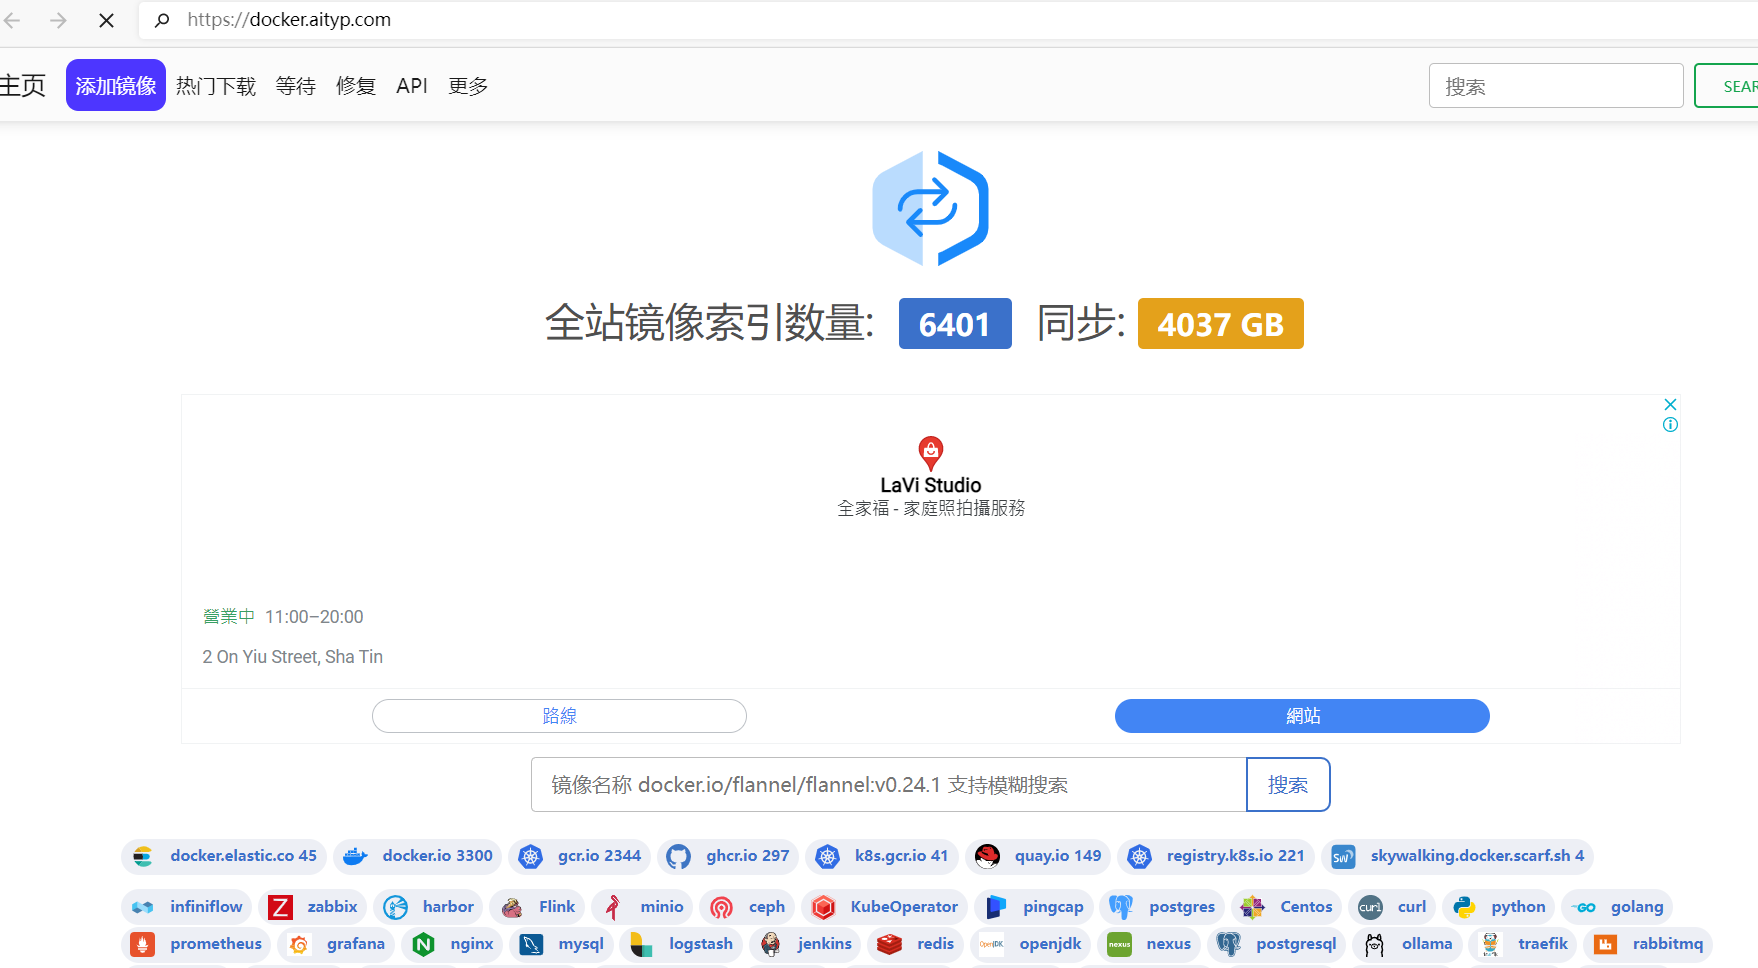 搜索tomcat,点击受验证:
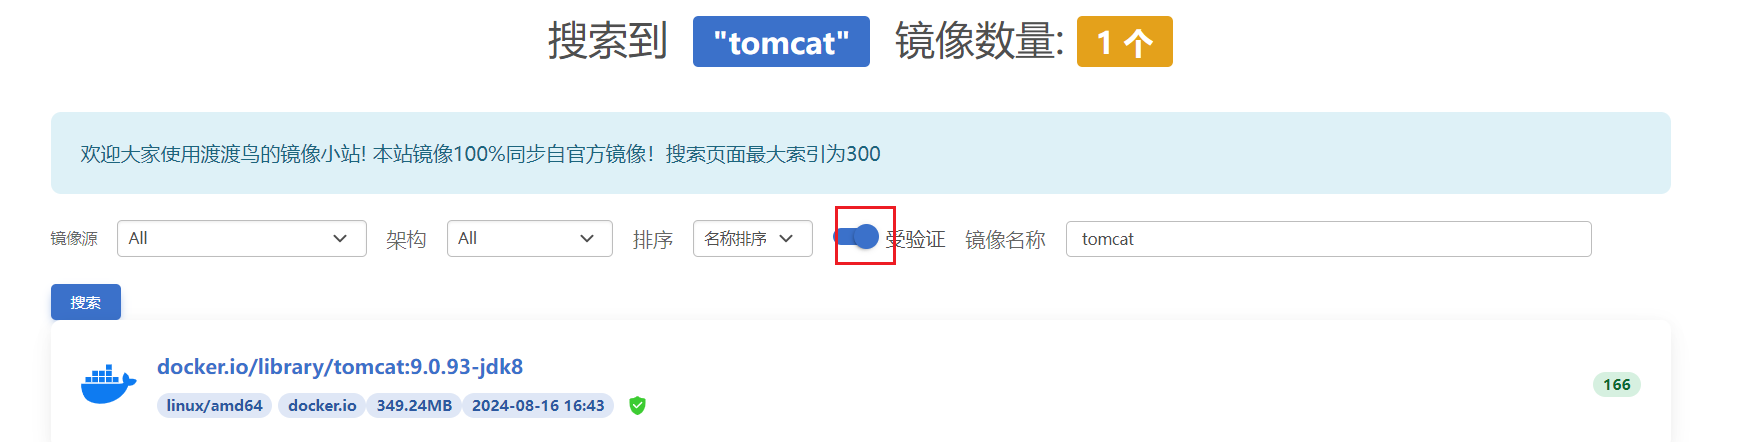 拉取tomcat:9.0.93-jdk8镜像:
sh
[root@hadoop104 ~]# docker pull tomcat:9.0.93-jdk8如果拉取不下来,可以直接使用指定镜像库地址: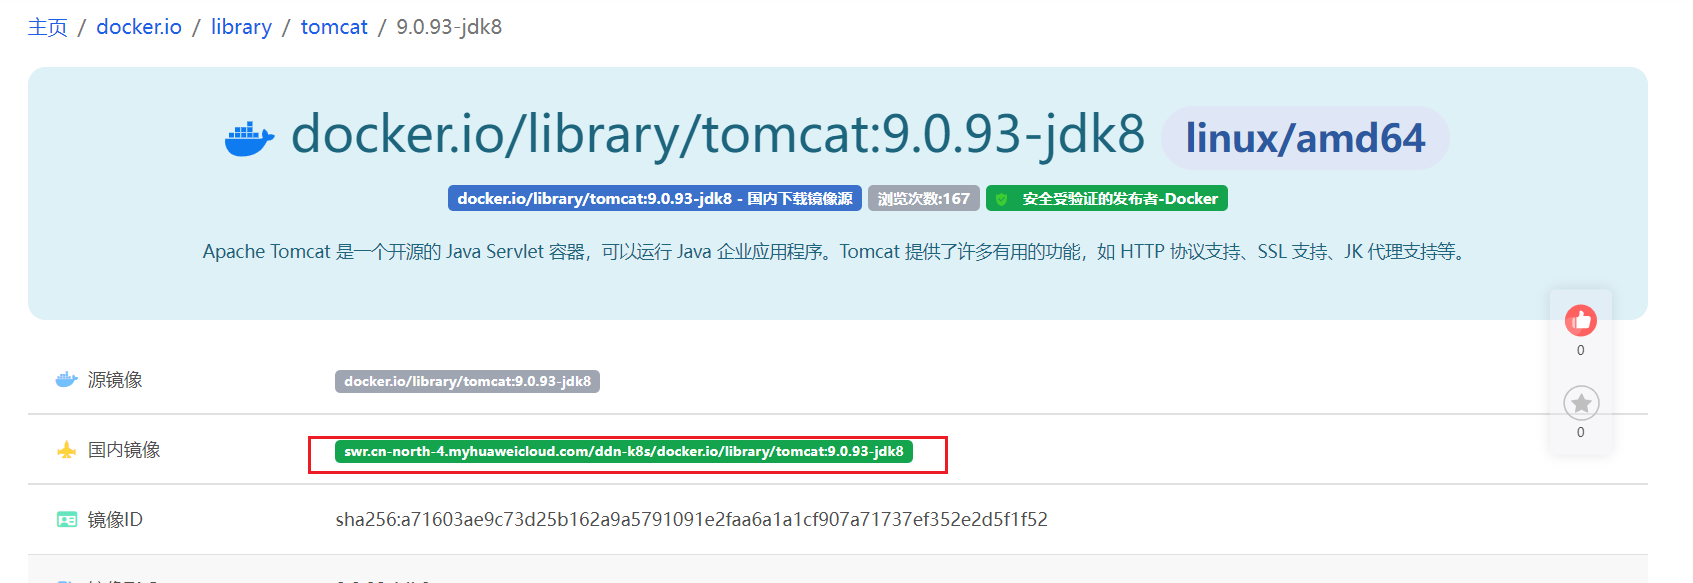 运行镜像,得到tomcat容器:
sh
[root@hadoop104 ~]# docker run -d -p 8080:8080 --name="tomcat8" tomcat:9.0.93-jdk8
bda88ee3743f6d53dd998a570720d765b6e346c50effd37af044dccd932cbd74
[root@hadoop104 ~]# docker ps
CONTAINER ID   IMAGE                COMMAND                   CREATED         STATUS         PORTS                                       NAMES
bda88ee3743f   tomcat:9.0.93-jdk8   "catalina.sh run"         6 seconds ago   Up 6 seconds   0.0.0.0:8080->8080/tcp, :::8080->8080/tcp   tomcat8
d56a0021bf57   ubuntu               "/bin/bash"               9 hours ago     Up 9 hours                                                 u1
d3a0010f4aa0 registry "/entrypoint.sh /etc…" 25 hours ago Up 25 hours 0.0.0.0:5000->5000/tcp, :::5000->5000/tcp nervous_mahavira访问http://hadoop104:8080 出现访问404,说明tomcat已经启动,但是不能看到tomcat猫,原因在于webapps以前默认的内容都转移到了webapp.dist目录中:
sh
[root@hadoop104 ~]# docker exec -it  7a7b744c2fce /bin/bash
root@7a7b744c2fce:/usr/local/tomcat# cd webapps
root@7a7b744c2fce:/usr/local/tomcat/webapps# ll
total 0
drwxr-xr-x. 2 root root  6 Aug 23 20:07 ./
drwxr-xr-x. 1 root root 30 Aug 23 20:08 ../
## 将webapps.dist的内容移动到webapps中
root@7a7b744c2fce:/usr/local/tomcat/webapps# cp -r ../webapps.dist/* ./
root@7a7b744c2fce:/usr/local/tomcat/webapps# ll
total 4
drwxr-xr-x.  1 root root   81 Oct 22 00:13 ./
drwxr-xr-x.  1 root root   57 Aug 23 20:08 ../
drwxr-xr-x. 16 root root 4096 Oct 22 00:13 docs/
drwxr-xr-x.  7 root root   99 Oct 22 00:13 examples/
drwxr-xr-x.  6 root root   79 Oct 22 00:13 host-manager/
drwxr-xr-x.  6 root root  114 Oct 22 00:13 manager/
drwxr-xr-x.  3 root root  223 Oct 22 00:13 ROOT/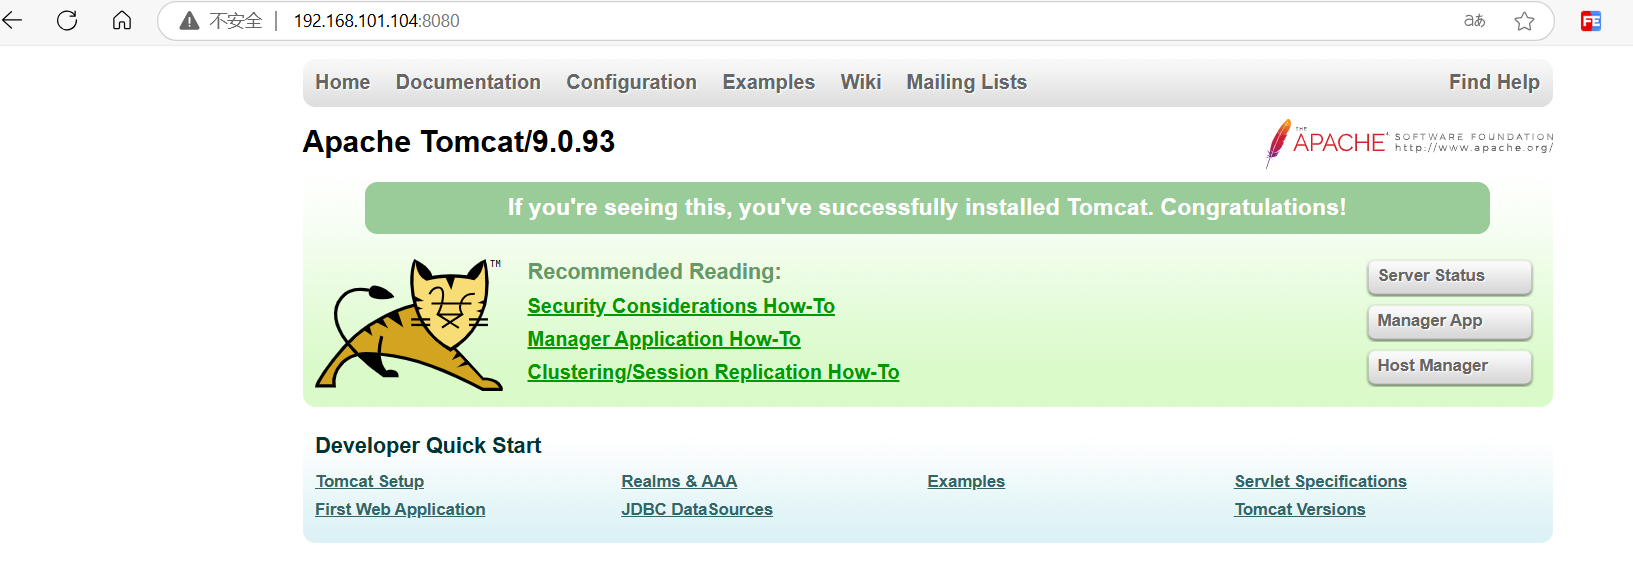
2. 安装mysql
2.1 下载mysql镜像
mysql:8.4.3为长期支持版:
sh
[root@hadoop104 ~]# docker pull mysql:8.4.3
8.4.3: Pulling from library/mysql
eba3c26198b7: Pull complete
2b328be7f3cf: Pull complete
dfccffffaa13: Pull complete
39e0a5533d8e: Pull complete
a5394d74c142: Pull complete
9d7dbd4762de: Pull complete
38d47438f1e4: Pull complete
403b4956745f: Pull complete
7cf348cec4fb: Pull complete
d44a5b7781d0: Pull complete
Digest: sha256:bda6ee1f3ae5ebb3cbe9b995c9645ffbd36d7dbda3bd4b4d2ffa43d997073074
Status: Downloaded newer image for mysql:8.4.3
docker.io/library/mysql:8.4.32.2 启动mysql镜像
sh
[root@hadoop104 ~]# docker run -d -p 3306:3306 \
--privileged=true \
-v /mysql/log:/var/log/mysql \
-v /mysql/data:/var/lib/mysql \
-v /mysql/conf:/etc/mysql/conf.d \
-e MYSQL_ROOT_PASSWORD=123456 --name="mysql8" mysql:8.4.3
58540defac191deff38420458c62e451d324e30f2e00d24e000afa808fc1384e2.3 配置mysql字符集
sh
[root@hadoop104 ~]# cd /mysql/conf/
[root@hadoop104 conf]# ll
总用量 0
[root@hadoop104 conf]# vim my.cnf
[root@hadoop104 conf]# cat my.cnf
[client]
default_character_set=utf8
[mysqld]
collation_server=utf8_general_ci
character_set_server=utf8
default-time-zone=Asia/Shanghai
mysql_native_password=ON2.4 重启mysql容器
sh
[root@hadoop104 conf]# docker ps
CONTAINER ID   IMAGE         COMMAND                   CREATED         STATUS         PORTS                                                  NAMES
58540defac19   mysql:8.4.3   "docker-entrypoint.s…"   6 minutes ago   Up 6 minutes   0.0.0.0:3306->3306/tcp, :::3306->3306/tcp, 33060/tcp   mysql8
[root@hadoop104 conf]# docker restart mysql8
mysql82.5 验证mysql
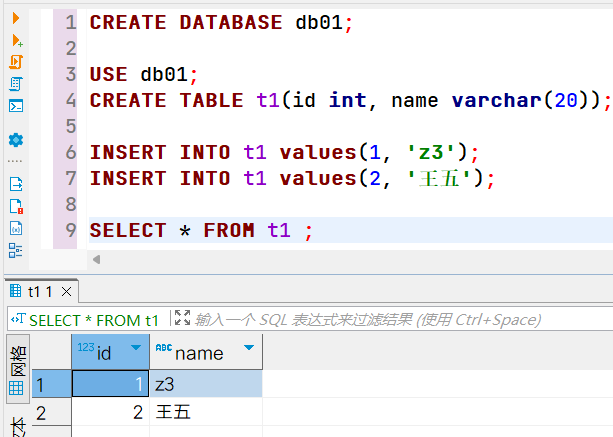
使用DBeaver客户端,远程连接mysql: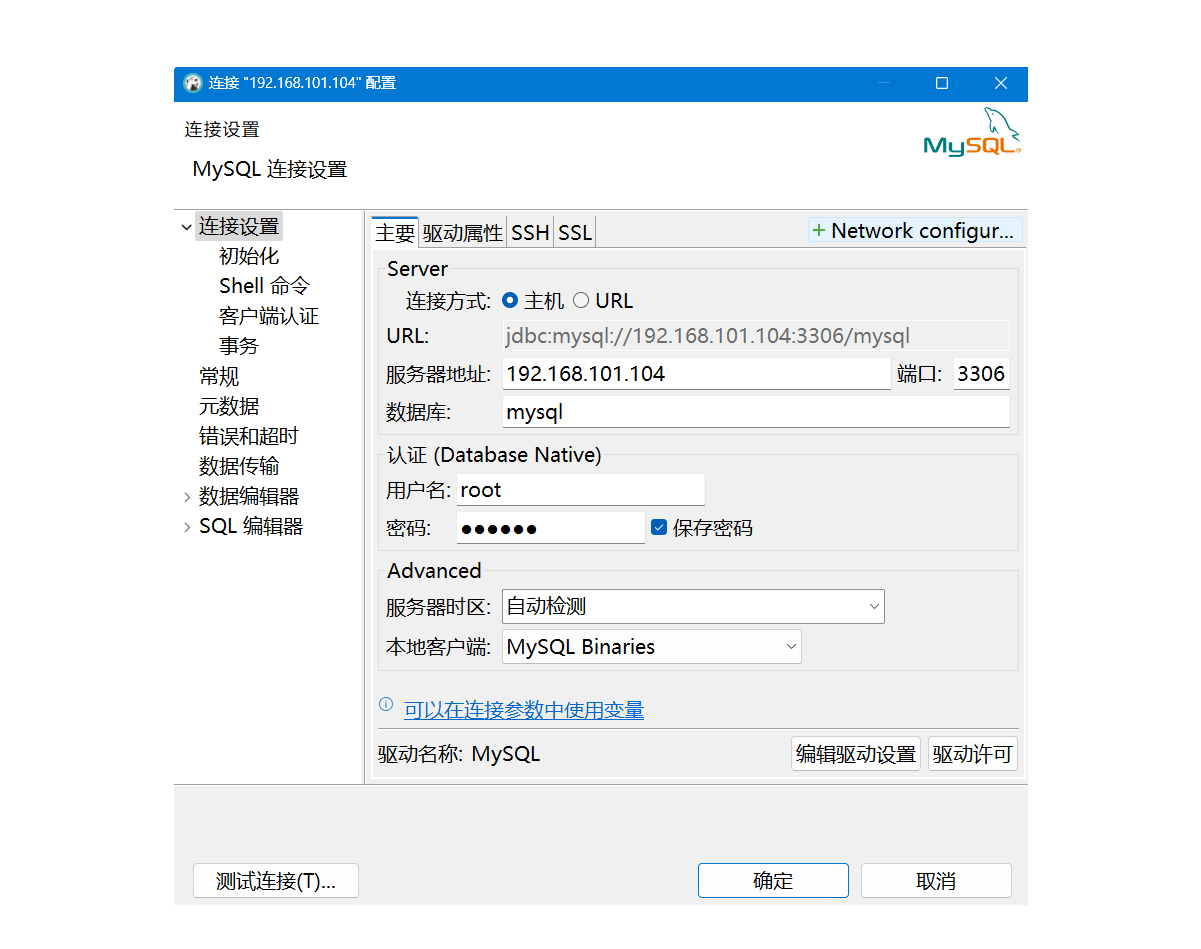
 查看服务器数据目录:
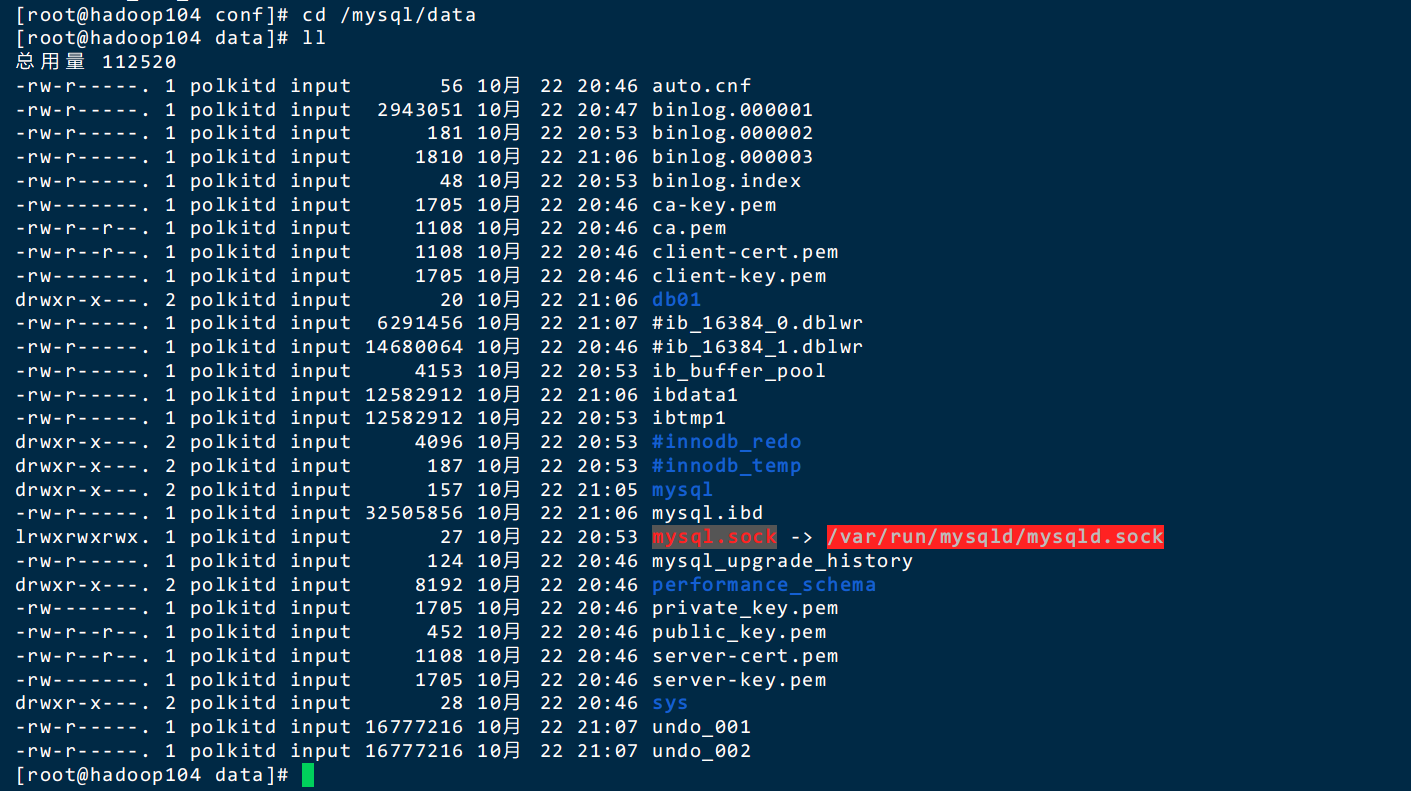
3. 安装redis
3.1 拉取redis7.4.1
sh
[root@hadoop104 ~]# docker pull redis:7.4.13.2 启动redis镜像
sh
[root@hadoop104 redis]# docker run -p 6379:6379 --name "redis7" --privileged=true -v /redis/redis.conf:/etc/redis/redis.conf -v /redis/data:/data -d redis:7.4.1 redis-server /etc/redis/redis.conf
b3a71b36ad076984b1819f3ce6b5ea54c360a6affbfaff1695ad1088231e10443.3 配置redis
为了方便后续验证配置生效,配置databases只有8个:
sh
[root@hadoop104 redis]# cd /redis/
[root@hadoop104 redis]# vim redis.conf
[root@hadoop104 redis]# cat redis.conf
################################## NETWORK #####################################
#bind 127.0.0.1
protected-mode no
port 6379
tcp-backlog 511
timeout 0
tcp-keepalive 300
################################# GENERAL #####################################
#daemonize no
supervised no
pidfile /var/run/redis_6379.pid
loglevel notice
logfile "/data/redis_log"
databases 8
################################ SNAPSHOTTING  ################################
save 120 1
save 300 10
save 60 10000
stop-writes-on-bgsave-error yes
rdbcompression yes
rdbchecksum yes
dbfilename dump.rdb
dir /data/
################################# REPLICATION #################################
slave-serve-stale-data yes
slave-read-only yes
repl-diskless-sync no
repl-diskless-sync-delay 5
repl-disable-tcp-nodelay no
slave-priority 100
############################## APPEND ONLY MODE ###############################
appendonly no
appendfilename "appendonly.aof"
# appendfsync always
appendfsync everysec
# appendfsync no
no-appendfsync-on-rewrite no
auto-aof-rewrite-percentage 100
auto-aof-rewrite-min-size 64mb
aof-load-truncated yes
################################ LUA SCRIPTING  ###############################
lua-time-limit 5000
################################## SLOW LOG ###################################
slowlog-log-slower-than 10000
slowlog-max-len 128
################################ LATENCY MONITOR ##############################
latency-monitor-threshold 0
notify-keyspace-events ""
############################### ADVANCED CONFIG ###############################
hash-max-ziplist-entries 512
hash-max-ziplist-value 64
list-max-ziplist-size -2
list-compress-depth 0
set-max-intset-entries 512
zset-max-ziplist-entries 128
zset-max-ziplist-value 64
hll-sparse-max-bytes 3000
activerehashing yes
client-output-buffer-limit normal 0 0 0
client-output-buffer-limit slave 256mb 64mb 60
client-output-buffer-limit pubsub 32mb 8mb 60
hz 10
aof-rewrite-incremental-fsync yes
[root@hadoop104 redis]# docker restart redis7
redis73.4 验证redis
打开redis客户端RedisInsight,配置redis连接: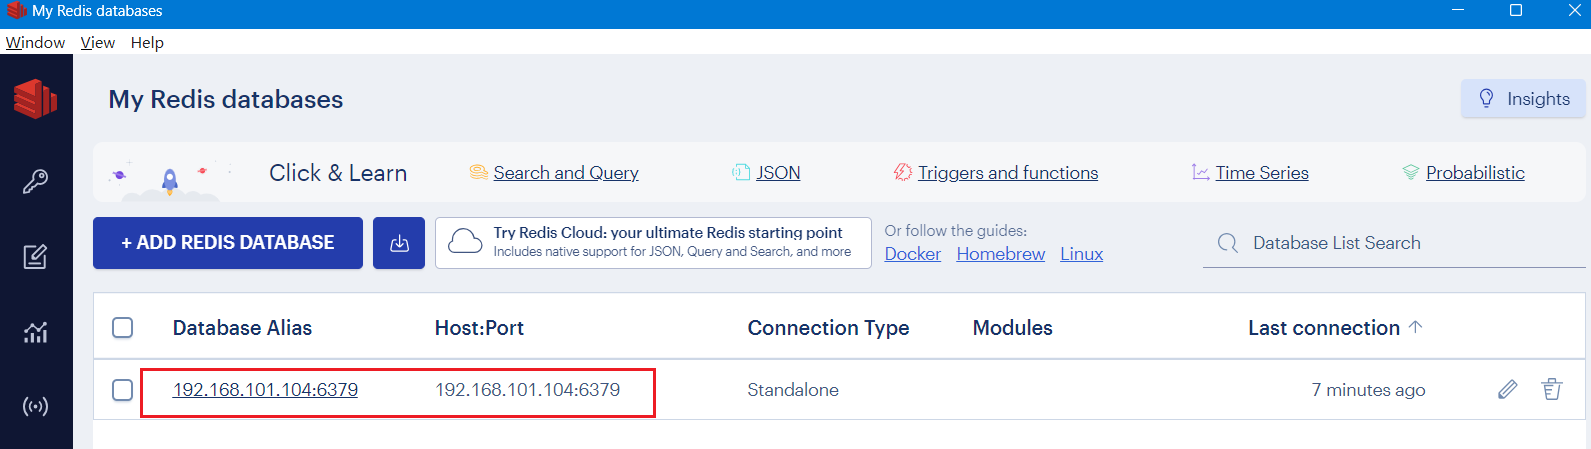 可以看到当前默认为0号库
  选择15号库,可以看到客户端报错没有15号库:
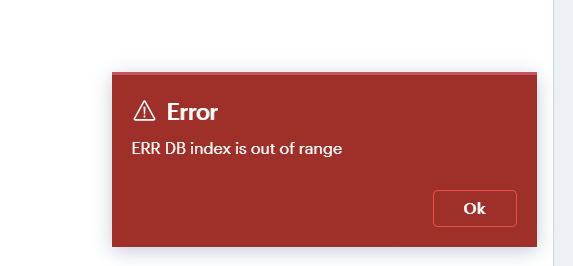
4. 安装nginx
参考后面教程Portainer
5. 搭建mysql主从复制
5.1 拉取MySQL镜像
sh
[root@hadoop102 ~]# docker pull swr.cn-north-4.myhuaweicloud.com/ddn-k8s/docker.io/mysql:8.0.40
## 修改镜像名称,方便后续使用
[root@hadoop102 ~]# docker tag swr.cn-north-4.myhuaweicloud.com/ddn-k8s/docker.io/mysql:8.0.40 mysql:8.0.405.2 新建主实例
sh
[root@hadoop102 ~]# mkdir -p /mysql-cluster/mysql-master/log
[root@hadoop102 ~]# mkdir -p /mysql-cluster/mysql-master/data
[root@hadoop102 ~]# mkdir -p /mysql-cluster/mysql-master/conf
[root@hadoop102 ~]# docker run -p 4306:3306 --name mysql-master \
--privileged=true \
-v /mysql-cluster/mysql-master/log:/var/log/mysql \
-v /mysql-cluster/mysql-master/data:/var/lib/mysql \
-v /mysql-cluster/mysql-master/conf:/etc/mysql/conf.d \
-e MYSQL_ROOT_PASSWORD=root  \
-d mysql:8.0.40在/mysql-cluster/mysql-master/conf目录下,新建my.cnf
ini
[mysqld]
## 设置server_id,同一局域网中需要唯一
server_id=100
## 指定不需要同步的数据库名称
binlog-ignore-db=mysql
## 开启二进制日志功能
log-bin=mall-mysql-bin
## 设置二进制日志使用内存大小(事务)
binlog_cache_size=1M
## 设置使用的二进制日志格式(mixed,statement,row)
binlog_format=row
## 二进制日志过期清理时间。默认值为0,表示不自动清理。
expire_logs_days=7
## 跳过主从复制中遇到的所有错误或指定类型的错误,避免slave端复制中断。
## 如:1062错误是指一些主键重复,1032错误是因为主从数据库数据不一致
slave_skip_errors=1062重启master实例
sh
docker restart mysql-master进入mysql-master容器:
sh
docker exec -it mysql-master /bin/bash
mysql -uroot -proot
mysql> CREATE USER 'slave'@'%' IDENTIFIED BY '123456';
mysql> GRANT REPLICATION SLAVE,USAGE, REPLICATION CLIENT ON *.* TO 'slave'@'%';5.3 新建从实例
启动容器实例:
sh
docker run --privileged=true -p 4307:3306 --name mysql-slave \
-v /mysql-cluster/mysql-slave/log:/var/log/mysql \
-v /mysql-cluster/mysql-slave/data:/var/lib/mysql \
-v /mysql-cluster/mysql-slave/conf:/etc/mysql/conf.d \
-e MYSQL_ROOT_PASSWORD=root  \
-d mysql:8.0.40在/mysql-cluster/mysql-slave/conf目录下,新建my.cnf
ini
[mysqld]
## 设置server_id,同一局域网中需要唯一
server_id=102
## 指定不需要同步的数据库名称
binlog-ignore-db=mysql
## 开启二进制日志功能,以备Slave作为其它数据库实例的Master时使用
log-bin=mall-mysql-slave1-bin
## 设置二进制日志使用内存大小(事务)
binlog_cache_size=1M
## 设置使用的二进制日志格式(mixed,statement,row)
binlog_format=row
## 二进制日志过期清理时间。默认值为0,表示不自动清理。
expire_logs_days=7
## 跳过主从复制中遇到的所有错误或指定类型的错误,避免slave端复制中断。
## 如:1062错误是指一些主键重复,1032错误是因为主从数据库数据不一致
slave_skip_errors=1062
## relay_log配置中继日志
relay_log=mall-mysql-relay-bin
## log_slave_updates表示slave将复制事件写进自己的二进制日志
log_slave_updates=1
## slave设置为只读(具有super权限的用户除外)
read_only=1修改完配置后重启slave实例:
sh
docker restart mysql-slave5.4 在主数据库中查看主从同步状态
sh
[root@hadoop102 ~]# docker exec -it mysql-master /bin/bash
bash-5.1# mysql -uroot -p
Enter password:
mysql> show master status\G
*************************** 1. row ***************************
             File: mall-mysql-bin.000003
         Position: 157
     Binlog_Do_DB:
 Binlog_Ignore_DB: mysql
Executed_Gtid_Set:
1 row in set (0.01 sec)记录File和Position的值,稍后会在从服务器上用到。
5.5 配置主从复制
sh
[root@hadoop102 ~]# docker exec -it mysql-slave /bin/bash
bash-5.1# mysql -uroot -proot
mysql> change master to master_host='192.168.101.102', master_user='slave', master_password='123456', master_port=4306, master_log_file='mall-mysql-bin.000003', master_log_pos=157, master_connect_retry=30;
mysql> show slave status \G;
*************************** 1. row ***************************
               Slave_IO_State:
                  Master_Host: 192.168.101.102
                  Master_User: slave
                  Master_Port: 4306
                Connect_Retry: 30
              Master_Log_File: mall-mysql-bin.000003
          Read_Master_Log_Pos: 157
               Relay_Log_File: mall-mysql-relay-bin.000001
                Relay_Log_Pos: 4
        Relay_Master_Log_File: mall-mysql-bin.000003
             Slave_IO_Running: No
            Slave_SQL_Running: No
              Replicate_Do_DB:
          Replicate_Ignore_DB:
           Replicate_Do_Table:
       Replicate_Ignore_Table:
      Replicate_Wild_Do_Table:
  Replicate_Wild_Ignore_Table:
                   Last_Errno: 0
                   Last_Error:
                 Skip_Counter: 0
          Exec_Master_Log_Pos: 157
              Relay_Log_Space: 157
              Until_Condition: None
               Until_Log_File:
                Until_Log_Pos: 0
           Master_SSL_Allowed: No
           Master_SSL_CA_File:
           Master_SSL_CA_Path:
              Master_SSL_Cert:
            Master_SSL_Cipher:
               Master_SSL_Key:
        Seconds_Behind_Master: NULL
Master_SSL_Verify_Server_Cert: No
                Last_IO_Errno: 2003
                Last_IO_Error: Error connecting to source 'slave@172.17.0.3:4306'. This was attempt 9/86400, with a delay of 30 seconds between attempts. Message: Can't connect to MySQL server on '172.17.0.3:4306' (111)
               Last_SQL_Errno: 0
               Last_SQL_Error:
  Replicate_Ignore_Server_Ids:
             Master_Server_Id: 0
                  Master_UUID:
             Master_Info_File: mysql.slave_master_info
                    SQL_Delay: 0
          SQL_Remaining_Delay: NULL
      Slave_SQL_Running_State:
           Master_Retry_Count: 86400
                  Master_Bind:
      Last_IO_Error_Timestamp: 250406 23:44:51
     Last_SQL_Error_Timestamp:
               Master_SSL_Crl:
           Master_SSL_Crlpath:
           Retrieved_Gtid_Set:
            Executed_Gtid_Set:
                Auto_Position: 0
         Replicate_Rewrite_DB:
                 Channel_Name:
           Master_TLS_Version:
       Master_public_key_path:
        Get_master_public_key: 0
            Network_Namespace:
1 row in set, 1 warning (0.00 sec)在从数据库中开启主从同步:
sh
mysql> start slave;
Query OK, 0 rows affected, 1 warning (0.17 sec)查看从数据库状态发现已经同步:
sh
mysql> show slave status\G
*************************** 1. row ***************************
               Slave_IO_State: Waiting for source to send event
                  Master_Host: 192.168.101.102
                  Master_User: slave
                  Master_Port: 4306
                Connect_Retry: 30
              Master_Log_File: mall-mysql-bin.000003
          Read_Master_Log_Pos: 157
               Relay_Log_File: mall-mysql-relay-bin.000002
                Relay_Log_Pos: 331
        Relay_Master_Log_File: mall-mysql-bin.000003
             Slave_IO_Running: Yes
            Slave_SQL_Running: Yes
              Replicate_Do_DB:
          Replicate_Ignore_DB:
           Replicate_Do_Table:
       Replicate_Ignore_Table:
      Replicate_Wild_Do_Table:
  Replicate_Wild_Ignore_Table:
                   Last_Errno: 0
                   Last_Error:
                 Skip_Counter: 0
          Exec_Master_Log_Pos: 157
              Relay_Log_Space: 546
              Until_Condition: None
               Until_Log_File:
                Until_Log_Pos: 0
           Master_SSL_Allowed: No
           Master_SSL_CA_File:
           Master_SSL_CA_Path:
              Master_SSL_Cert:
            Master_SSL_Cipher:
               Master_SSL_Key:
        Seconds_Behind_Master: 0
Master_SSL_Verify_Server_Cert: No
                Last_IO_Errno: 0
                Last_IO_Error:
               Last_SQL_Errno: 0
               Last_SQL_Error:
  Replicate_Ignore_Server_Ids:
             Master_Server_Id: 100
                  Master_UUID: 9bd45a5e-1335-11f0-b43e-0242ac110003
             Master_Info_File: mysql.slave_master_info
                    SQL_Delay: 0
          SQL_Remaining_Delay: NULL
      Slave_SQL_Running_State: Replica has read all relay log; waiting for more updates
           Master_Retry_Count: 86400
                  Master_Bind:
      Last_IO_Error_Timestamp:
     Last_SQL_Error_Timestamp:
               Master_SSL_Crl:
           Master_SSL_Crlpath:
           Retrieved_Gtid_Set:
            Executed_Gtid_Set:
                Auto_Position: 0
         Replicate_Rewrite_DB:
                 Channel_Name:
           Master_TLS_Version:
       Master_public_key_path:
        Get_master_public_key: 0
            Network_Namespace:
1 row in set, 1 warning (0.00 sec)主从复制测试,主机新建库-使用库-新建表-插入数据,ok 从机使用库-查看记录,ok
6. 搭建redis集群
使用Docker搭建3主3从的redis容器实例: 哈希槽分区进行亿级数据存储