其他API
1. Path
Path实例表示文件系统中的路径。一个路径可以指向一个文件或一个目录。路径可以是绝对路径,也可以是相对路径。绝对路径包含从文件系统的根目录到它指向的 文件或目录的完整路径。相对路径包含相对于其他路径的文件或目录的路径。
1.1 创建Path实例
可以使用 Paths 类(java.nio.file.Paths)中的静态方法 Paths.get()来创建路径实例。
Path path = Paths.get("d:\\jack\\001.txt");1.2 创建绝对路径
创建绝对路径,通过调用Paths.get()方法,给定绝对路径文件作为参数来完成。
Path path = Paths.get("d:\\jack\\001.txt");1.3 创建相对路径
使用Paths.get(basePath, relativePath)方法创建一个相对路径。
//代码 1
Path projects = Paths.get("d:\\jack", "projects");
//代码 2
Path file = Paths.get("d:\\jack", "projects\\002.txt");1.4 Path.normalize()
Path 接口的normalize()方法可以使路径标准化。标准化意味着它将移除所有在路径字符串的中间的.和..代码,并解析路径字符串所引用的路径。
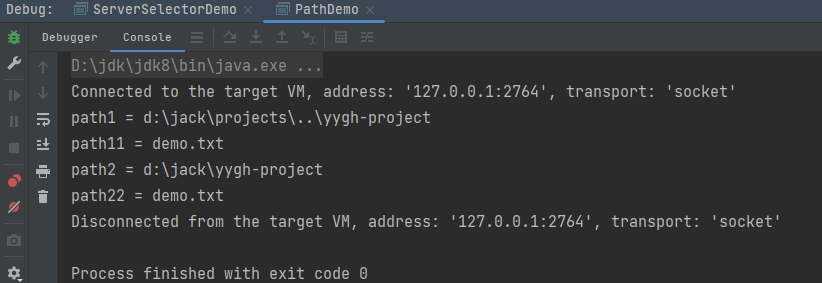
public static void main(String[] args) {
    String originalPath = "d:\\jack\\projects\\..\\yygh-project";
    String path = "demo.txt";
    Path path1 = Paths.get(originalPath);
    Path path11 = Paths.get(path);
    System.out.println("path1 = " + path1);
    System.out.println("path11 = " + path11);
    Path path2 = path1.normalize();
    Path path22 = path11.normalize();
    System.out.println("path2 = " + path2);
    System.out.println("path22 = " + path22);
}
2. Files
Files类(java.nio.file.Files)提供了几种操作文件的方法
2.1 Files.createDirectory()
用于根据Path实例创建一个新目录
Path path = Paths.get("d:\\sgg");
try {
    Path newDir = Files.createDirectory(path);
} catch(FileAlreadyExistsException e){
    // 目录已经存在
} catch (IOException e) {
    // 其他发生的异常
    e.printStackTrace();
}2.2 Files.copy()
- Files.copy()方法从一个路径拷贝一个文件到另外一个目录
Path sourcePath = Paths.get("d:\\demo\\01.txt");
Path destinationPath = Paths.get("d:\\demo\\002.txt");
try {
    Files.copy(sourcePath, destinationPath);
} catch(FileAlreadyExistsException e) {
    // 目录已经存在
} catch (IOException e) {
    // 其他发生的异常
    e.printStackTrace();
}警告
如果目标文件已经存在,则抛出一个java.nio.file.FileAlreadyExistsException异常。如果有其他错误,则会抛出一个IOException。例如将该文件复制到不存在的目录,则会抛出IOException。
- 覆盖已存在的文件
Files.copy(sourcePath, destinationPath, StandardCopyOption.REPLACE_EXISTING);2.3 Files.move()
Files.move()用于将文件从一个路径移动到另一个路径。移动文件与重命名相同,但是移动文件既可以移动到不同的目录,也可以在相同的操作中更改它的名称。
Path sourcePath = Paths.get("d:\\jack\\01.txt");
Path destinationPath = Paths.get("d:\\jack\\001.txt");
try {
    Files.move(sourcePath, destinationPath, StandardCopyOption.REPLACE_EXISTING);
} catch (IOException e) {
    //移动文件失败
    e.printStackTrace();
}2.4 Files.delete()
Files.delete()方法可以删除一个文件或者目录。创建指向要删除的文件的 Path。然后调用 Files.delete()方法。如果 Files.delete()不能删除文件(例如,文件或目录不存在),会抛出一个 IOException。
Path path = Paths.get("d:\\jack\\001.txt");
try {
    Files.delete(path);
} catch (IOException e) {
    // 删除文件失败
    e.printStackTrace();
}2.5 Files.walkFileTree()
Files.walkFileTree()方法包含递归遍历目录树功能,将Path实例和FileVisitor作为参数。Path实例指向要遍历的目录,FileVisitor在遍历期间被调用。FileVisitor是一个接口,必须自己实现FileVisitor接口,并将实现的实例传递给walkFileTree()方法。在目录遍历过程中,您的FileVisitor实现的每个方法都将被调用。如果不需要实现所有这些方法,那么可以扩展SimpleFileVisitor类,它包含FileVisitor接口中所有方法的默认实现。FileVisitor接口的方法中,每个都返回一个FileVisitResult枚举实例。FileVisitResult枚举包含以下四个选项:- CONTINUE 继续
- TERMINATE 终止
- SKIP_SIBLING 跳过同级
- SKIP_SUBTREE 跳过子级
3. AsynchronousFileChannel
在 Java 7中,Java NIO中添加了AsynchronousFileChannel,也就是是异步地将数据写入文件。
3.1 创建 AsynchronousFileChannel
通过静态方法 open()创建
Path path = Paths.get("d:\\jack\\01.txt");
try {
AsynchronousFileChannel fileChannel = AsynchronousFileChannel.open(path, StandardOpenOption.READ);
} catch (IOException e) {
    e.printStackTrace();
}open()方法的第一个参数指向与AsynchronousFileChannel相关联文件的Path实例。第二个参数是一个或多个打开选项,它告诉AsynchronousFileChannel在文件上执行什么操作。在本例中,我们使用了StandardOpenOption.READ选项,表示该文件将被打开阅读。
3.2 通过Future读取数据
通过调用返回Future的read()方法
public static void main(String[] args) throws ExecutionException, InterruptedException {
    Path path = Paths.get("C:\\Users\\mi\\Downloads\\灵境行者.txt");
    AsynchronousFileChannel fileChannel = null;
    try {
        fileChannel = AsynchronousFileChannel.open(path, StandardOpenOption.READ);
    } catch (IOException e) {
        e.printStackTrace();
    }
    ByteBuffer buffer = ByteBuffer.allocate(1024);
    long position = 0;
    long readPos = 0;
    while ((readPos = fileChannel.read(buffer, position).get())>0){
        position += readPos;
        buffer.flip();
        byte[] data = new byte[buffer.limit()];
        buffer.get(data);
        System.out.println(new String(data));
        buffer.clear();
    }
}3.3 通过CompletionHandler读取数据
调用 read()方法,该方法将一个CompletionHandler作为参数传入。
3.4 通过Future写数据
Path path = Paths.get("d:\\jack\\001.txt");
AsynchronousFileChannel fileChannel = null;
try {
    fileChannel = AsynchronousFileChannel.open(path, StandardOpenOption.WRITE);
} catch (IOException e) {
    e.printStackTrace();
}
ByteBuffer buffer = ByteBuffer.allocate(1024);
long position = 0;
buffer.put("jack data".getBytes());
buffer.flip();
Future<Integer> operation = fileChannel.write(buffer, position);
buffer.clear();
while(!operation.isDone());
System.out.println("Write over");首先,AsynchronousFileChannel 以写模式打开。然后创建一个 ByteBuffer,并将一些数据写入其中。然后,ByteBuffer 中的数据被写入到文件中。最后,示例检查返回的 Future,以查看写操作完成时的情况。注意,文件必须已经存在。如果该文件不存在,那么 write()方法将抛出一个java.nio.file.NoSuchFileException。
3.5 通过CompletionHandler写数据
Path path = Paths.get("d:\\jack\\001.txt");
if(!Files.exists(path)){
    try {
        Files.createFile(path);
    } catch (IOException e) {
        e.printStackTrace();
    }
}
AsynchronousFileChannel fileChannel = null;
try {
    fileChannel = AsynchronousFileChannel.open(path, StandardOpenOption.WRITE);
} catch (IOException e) {
    e.printStackTrace();
}
ByteBuffer buffer = ByteBuffer.allocate(1024);
long position = 0;
buffer.put("jack data".getBytes());
buffer.flip();
fileChannel.write(buffer, position, buffer, new CompletionHandler<Integer, ByteBuffer>() {
    @Override
    public void completed(Integer result, ByteBuffer attachment) {
        System.out.println("bytes written: " + result);
}
@Override
public void failed(Throwable exc, ByteBuffer attachment) {
System.out.println("Write failed");
exc.printStackTrace();
}
});当写操作完成时,将会调用CompletionHandler的completed()方法。如果写失败,则会调用failed()方法。
4. 字符集Charset
4.1 Charset 常用静态方法
public static Charset forName(String charsetName)//通过编码类型获得 Charset 对象public static SortedMap<String,Charset> availableCharsets()//获得系统支持的所有编码方式public static Charset defaultCharset()//获得虚拟机默认的编码方式public static boolean isSupported(String charsetName)//判断是否支持该编码类型
4.2 Charset 常用普通方法
public final String name()//获得 Charset 对象的编码类型(String)public abstract CharsetEncoder newEncoder()//获得编码器对象public abstract CharsetDecoder newDecoder()//获得解码器对象
public static void main(String[] args) throws CharacterCodingException {
    Charset charset = Charset.forName("UTF-8");
    //1.获取编码器
    CharsetEncoder charsetEncoder = charset.newEncoder();
    //2.获取解码器
    CharsetDecoder charsetDecoder = charset.newDecoder();
    //3.获取需要解码编码的数据
    CharBuffer charBuffer = CharBuffer.allocate(1024);
    charBuffer.put("字符集编码解码");
    charBuffer.flip();
    //4.编码
    ByteBuffer byteBuffer = charsetEncoder.encode(charBuffer);
    System.out.println("编码后:");
    for (int i = 0; i < byteBuffer.limit(); i++) {
        System.out.println(byteBuffer.get());
    }
    //5.解码
    byteBuffer.flip();
    CharBuffer charBuffer1 = charsetDecoder.decode(byteBuffer);
    System.out.println("解码后:");
    System.out.println(charBuffer1.toString());
    System.out.println("指定其他格式解码:");
    Charset charset1 = Charset.forName("GBK");
    byteBuffer.flip();
    CharBuffer charBuffer2 = charset1.decode(byteBuffer);
    System.out.println(charBuffer2.toString());
    //6.获取 Charset 所支持的字符编码
    Map<String, Charset> map = Charset.availableCharsets();
    map.forEach((k,v)->{
        System.out.println(k+ v);
    });
}