SpringSecurity入门
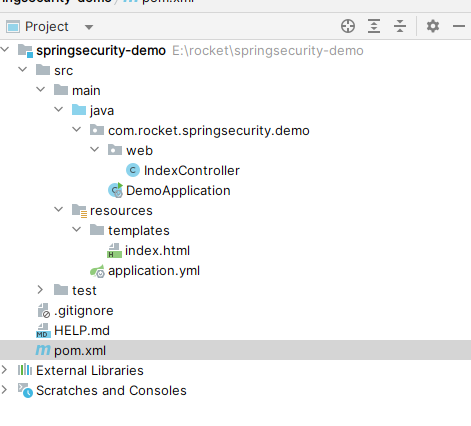
1. 创建Spring Boot项目
- 创建springboot项目名:security-demo:
2. 添加pom依赖
xml
<parent>
    <groupId>org.springframework.boot</groupId>
    <artifactId>spring-boot-starter-parent</artifactId>
    <version>3.4.0</version>
    <relativePath/>
</parent>
<groupId>com.rocket.springsecurity</groupId>
<artifactId>springsecurity-demo</artifactId>
<version>0.0.1-SNAPSHOT</version>
<name>springsecurity-demo</name>

<properties>
    <java.version>17</java.version>
    <project.build.sourceEncoding>UTF-8</project.build.sourceEncoding>
    <maven.compiler.source>17</maven.compiler.source>
    <maven.compiler.target>17</maven.compiler.target>
</properties>
<dependencies>
    <dependency>
        <groupId>org.springframework.boot</groupId>
        <artifactId>spring-boot-starter-thymeleaf</artifactId>
    </dependency>
    <dependency>
        <groupId>org.springframework.boot</groupId>
        <artifactId>spring-boot-starter-security</artifactId>
    </dependency>
    <dependency>
        <groupId>org.springframework.boot</groupId>
        <artifactId>spring-boot-starter-web</artifactId>
    </dependency>
</dependencies>这里模板选择的是Thymeleaf而不是freemarker, 主要是因为Spring对Thymeleaf支持很完善,以至于基本上不需要在application.yml配置即可直接使用,然后Thymeleaf支持各种SpringSecurity的标签。如果但从模板框架性能上,Thymeleaf并不是最佳的选择,但是实际上我们开发中性能影响最大的还是自己开发的代码☹️
3. 代码实现
java
@SpringBootApplication
@EnableWebSecurity
public class DemoApplication {
	public static void main(String[] args) {
		SpringApplication.run(DemoApplication.class, args);
	}
}java
@Controller
public class IndexController {

    @GetMapping("/")
    public String index() {
        return "index";
    }
}yml
spring:
  application:
name: springsecurity-demosh
<html>
<head>
    <meta charset="utf8">
    <title>index</title>
</head>
<body>
    <h1>你已经登录!</h1>
    <a th:href="@{/logout}">注销</a>
</body>
</html>其中在index.html中通过使用th:href="@{/logout}",Thymeleaf将自动处理生成正确的URL,以适应当前的上下文路径,使得url指向真正的注销退出功能。
4. 启动运行
可以看到控制台生成一次性密码:
5. 访问登录
访问http://localhost:8080/,会发现跳转到登录界面,初次加载会比较慢(因为它在加载国外的bootstrap.css😂,感兴趣可以查看DefaultLoginPageGeneratingFilter字符串拼装登录html内容):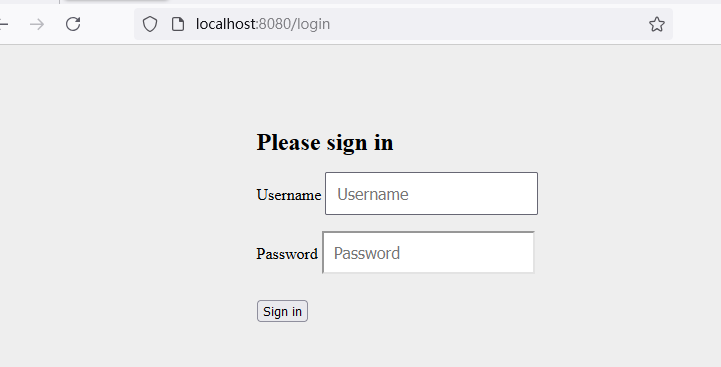 输入用户名:user,输入密码:在控制台的启动日志中查找初始的默认密码。点击"Sign in"进行登录,浏览器就跳转到了index页面:
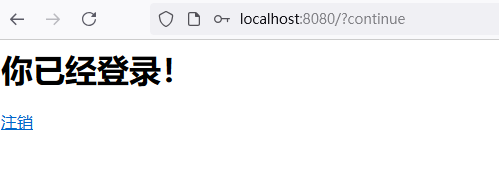
6. Spring Security默认提供功能
- 保护应用程序URL,要求对应用程序的任何交互进行身份验证。
- 程序启动时生成一个默认用户“user”。
- 生成一个默认的随机密码,并将此密码记录在控制台上。
- 生成默认的登录表单和注销页面。
- 提供基于表单的登录和注销流程。
- 对于Web请求,重定向到登录页面;
- 对于服务请求,返回401未经授权。
- 处理跨站请求伪造(CSRF)攻击。
- 处理会话劫持攻击。
- 写入Strict-Transport-Security以确保HTTPS。
- 写入X-Content-Type-Options以处理嗅探攻击。
- 写入Cache Control头来保护经过身份验证的资源。
- 写入X-Frame-Options以处理点击劫持攻击。