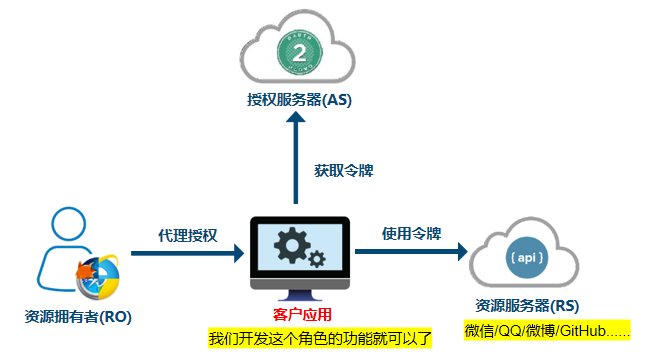
Spring中的OAuth2
1. Spring中相关实现
Spring对OAuth2在不同的项目中有对应的模块支持实现。
1.1 SpringSecurity方面
客户应用(OAuth2 Client):OAuth2客户端功能中包含OAuth2 Login
资源服务器(OAuth2 Resource Server)
<!-- 资源服务器 -->
<dependency>
	<groupId>org.springframework.boot</groupId>
	<artifactId>spring-boot-starter-oauth2-resource-server</artifactId>
</dependency>
<!-- 客户应用 -->
<dependency>
	<groupId>org.springframework.boot</groupId>
	<artifactId>spring-boot-starter-oauth2-client</artifactId>
</dependency>1.2 Spring方面
授权服务器(Spring Authorization Server):它是在Spring Security之上的一个单独的项目。
<!-- 授权服务器 -->
<dependency>
    <groupId>org.springframework.boot</groupId>
    <artifactId>spring-boot-starter-oauth2-authorization-server</artifactId>
</dependency>2. 授权登录的实现思路
3. GiuHub社交登录案例
3.1 创建应用
注册客户应用:登录GitHub,打开Settings: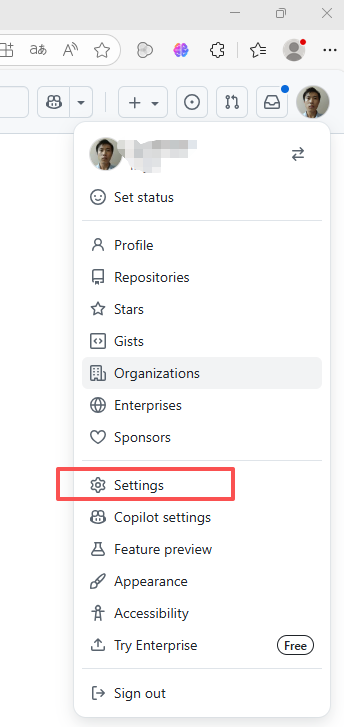 点击左侧最后一个菜单Developer Settings:
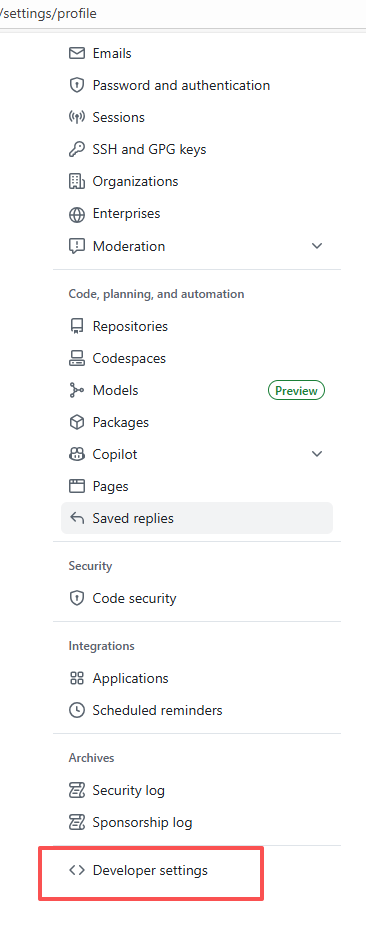 在Developer Settings中找到OAuth Apps,点击创建一个application:
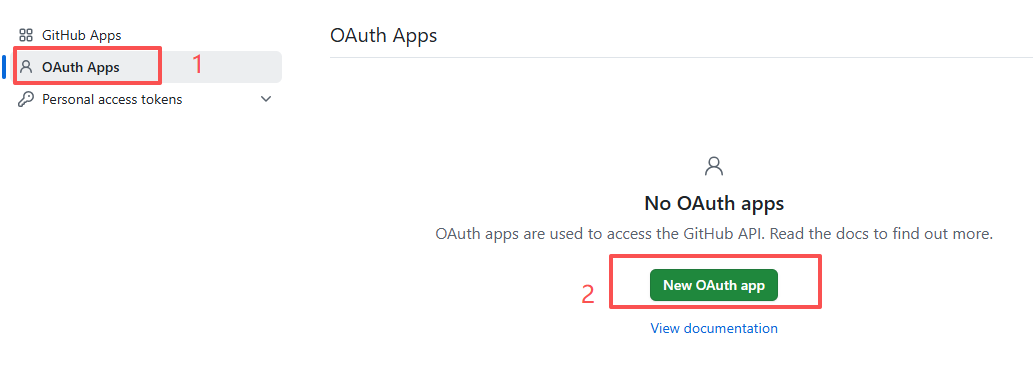 填写注册信息,点击Register application按钮,为客户应用创建访问GitHub的凭据。
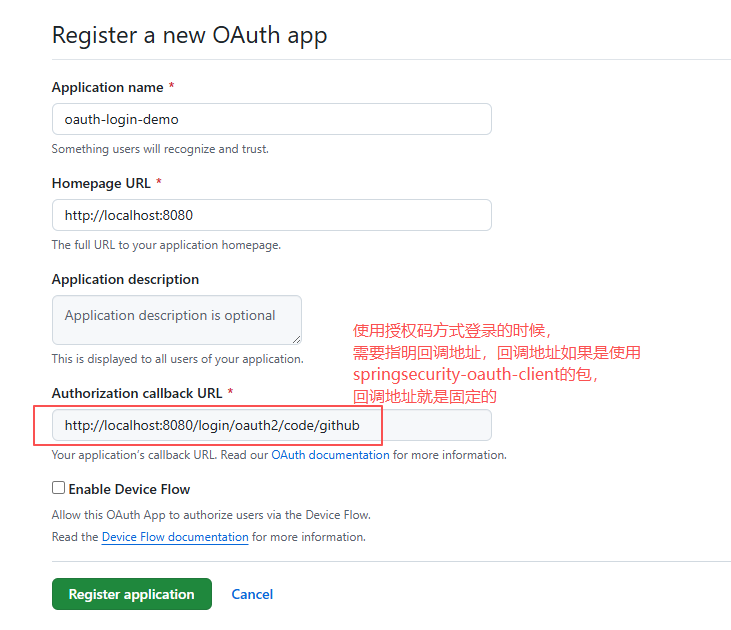
3.2 生成应用程序密钥
获取应用程序id: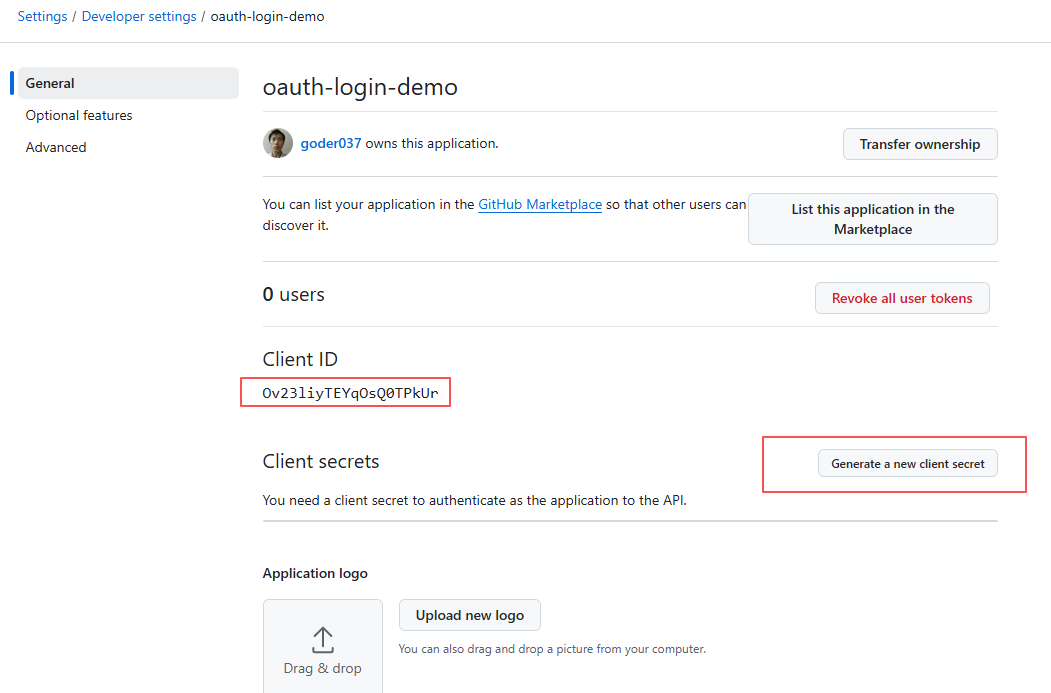 点击generate a new client secret,对于大型网站往往一般会要求得到Token的话,不仅要携带authorization code和callback url,还需要Client secret:
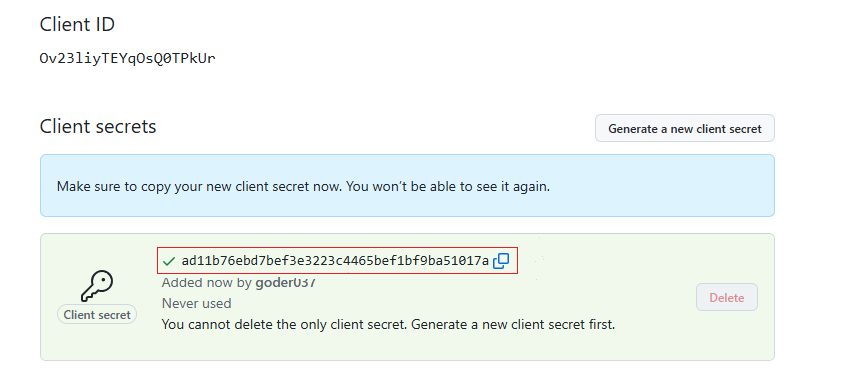 需要注意的是,Client secret只会显示一次,需要额外存起来,因为刷新页面或者以后再次进来都不会显示全部内容:
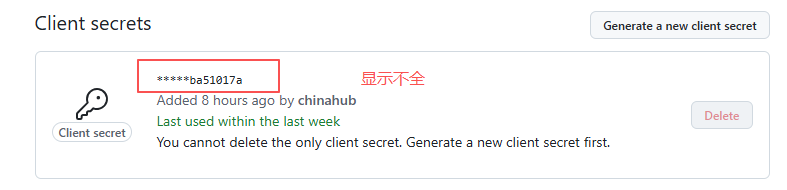
4. 创建oauth客户端项目
4.1 配置依赖
创建springsecurity-client项目,添加pom依赖:
<properties>
    <maven.compiler.source>17</maven.compiler.source>
    <maven.compiler.target>17</maven.compiler.target>
    <project.build.sourceEncoding>UTF-8</project.build.sourceEncoding>
</properties>

<dependencies>
    <dependency>
        <groupId>org.springframework.boot</groupId>
        <artifactId>spring-boot-starter-oauth2-client</artifactId>
        <version>3.5.5</version>
    </dependency>
    <dependency>
        <groupId>org.springframework.boot</groupId>
        <artifactId>spring-boot-starter-web</artifactId>
        <version>3.5.5</version>
    </dependency>
    <dependency>
        <groupId>org.thymeleaf.extras</groupId>
        <artifactId>thymeleaf-extras-springsecurity6</artifactId>
        <version>3.1.3.RELEASE</version>
    </dependency>
    <dependency>
        <groupId>org.springframework.boot</groupId>
        <artifactId>spring-boot-starter-thymeleaf</artifactId>
        <version>3.5.5</version>
    </dependency>
</dependencies>4.2 配置application.yaml
spring:
  security:
    oauth2:
      client:
        registration:
          github:
            client-id: Ov23liyTEYqOsQ0TPkUr
client-secret: ad11b76ebd7bef3e3223c4465bef1bf9ba51017a4.3 创建Controller
创建IndexController,添加如下代码:
@Controller
public class IndexController {

    @GetMapping("/")
    public String index(
            Model model,
            @RegisteredOAuth2AuthorizedClient OAuth2AuthorizedClient authorizedClient,
            @AuthenticationPrincipal OAuth2User oauth2User) {
        model.addAttribute("userName", oauth2User.getName());
        model.addAttribute("clientName", authorizedClient.getClientRegistration().getClientName());
        model.addAttribute("userAttributes", oauth2User.getAttributes());
        return "index";
    }
}4.4 创建html页面
在resources/templates目录下创建index.html:
<!DOCTYPE html>
<html xmlns="http://www.w3.org/1999/xhtml" xmlns:th="https://www.thymeleaf.org" xmlns:sec="https://www.thymeleaf.org/thymeleaf-extras-springsecurity5">
<head>
<title>Spring Security - OAuth 2.0 Login</title>
<meta charset="utf-8" />
</head>
<body>
<div style="float: right" th:fragment="logout" sec:authorize="isAuthenticated()">
<div style="float:left">
<span style="font-weight:bold">User: </span><span sec:authentication="name"></span>
</div>
<div style="float:none"> </div>
<div style="float:right">
<form action="#" th:action="@{/logout}" method="post">
<input type="submit" value="Logout" />
</form>
</div>
</div>
<h1>OAuth 2.0 Login with Spring Security</h1>
<div>
You are successfully logged in <span style="font-weight:bold" th:text="${userName}"></span>
via the OAuth 2.0 Client <span style="font-weight:bold" th:text="${clientName}"></span>
</div>
<div> </div>
<div>
<span style="font-weight:bold">User Attributes:</span>
<ul>
<li th:each="userAttribute : ${userAttributes}">
<span style="font-weight:bold" th:text="${userAttribute.key}"></span>: <span th:text="${userAttribute.value}"></span>
</li>
</ul>
</div>
</body>
</html>4.5 创建启动类
编写启动类ClientMain:
@SpringBootApplication
public class ClientMain {
    public static void main(String[] args) {
        SpringApplication.run(ClientMain.class, args);
    }
}4.6 启动程序
访问http://localhost:8080 ,浏览器将被重定向到一个用于GitHub登录的链接。 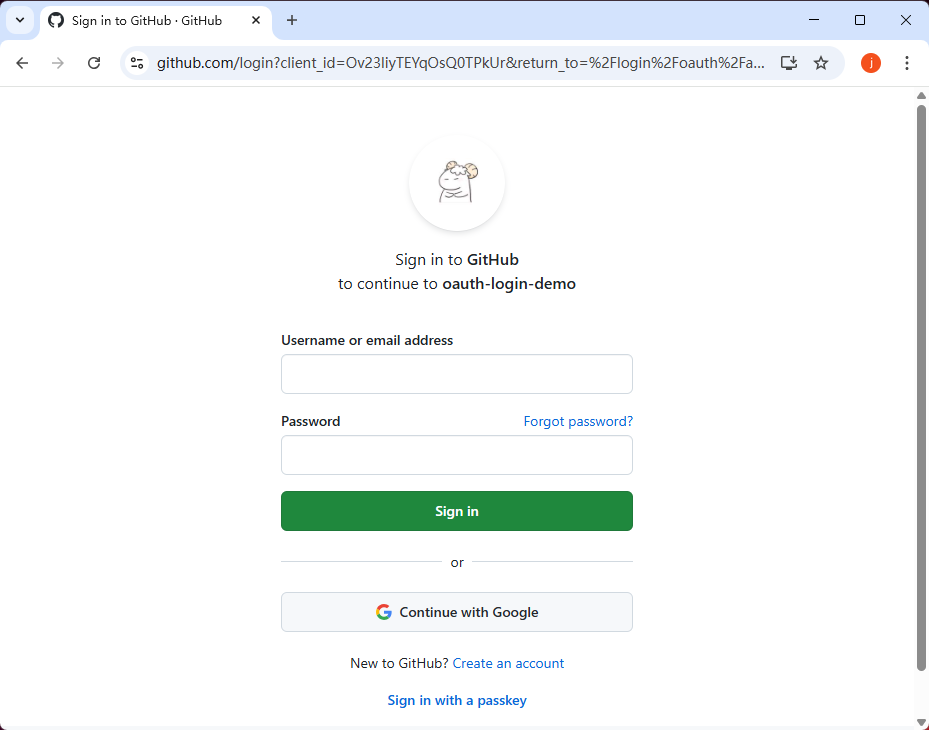 url地址中可以看到我们应用的client_id, 在github上面进行用户名密码登录, 登录成功后提示是否授权用户信息:
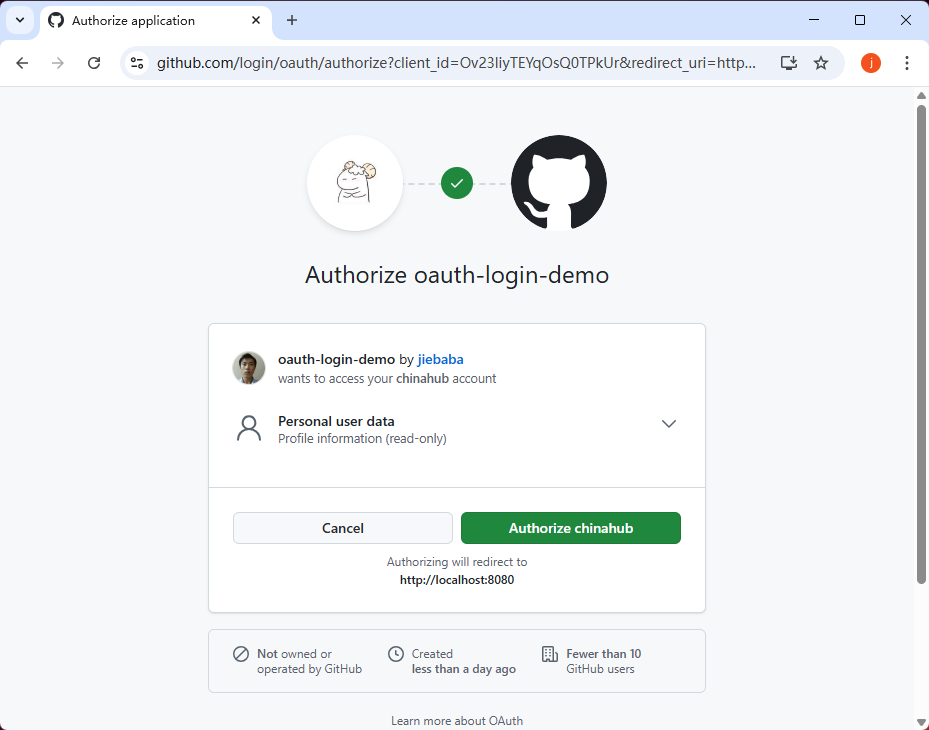 点击Authorize按钮后,跳转到是否授权登录,继续点击Authorize按钮:
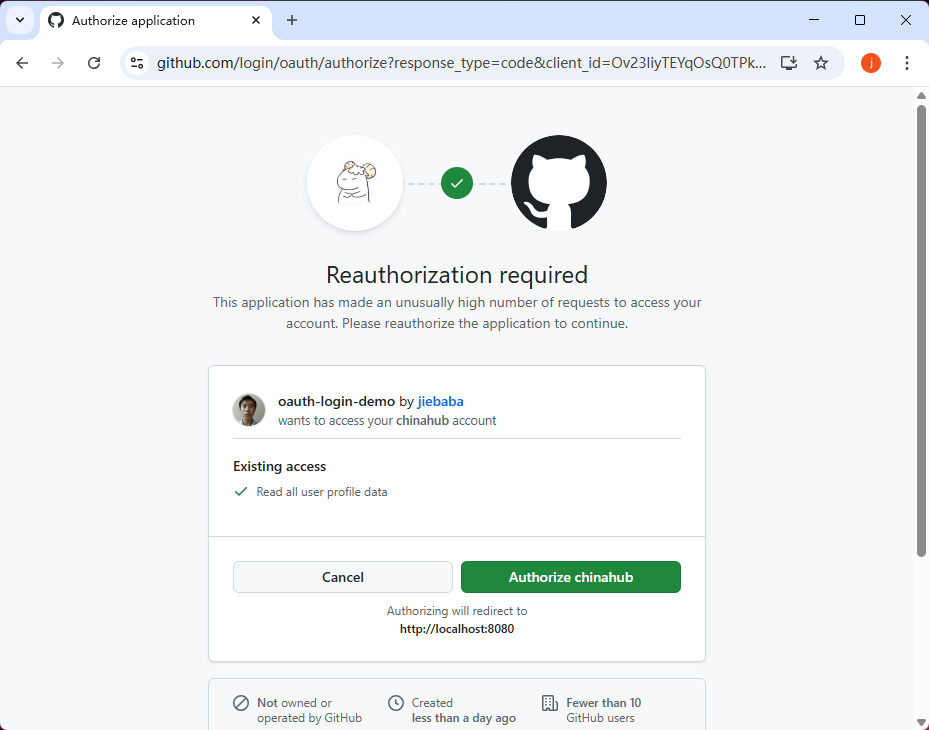 最后会跳转到index.html页面,index.html页面中会遍历用户信息并打印:
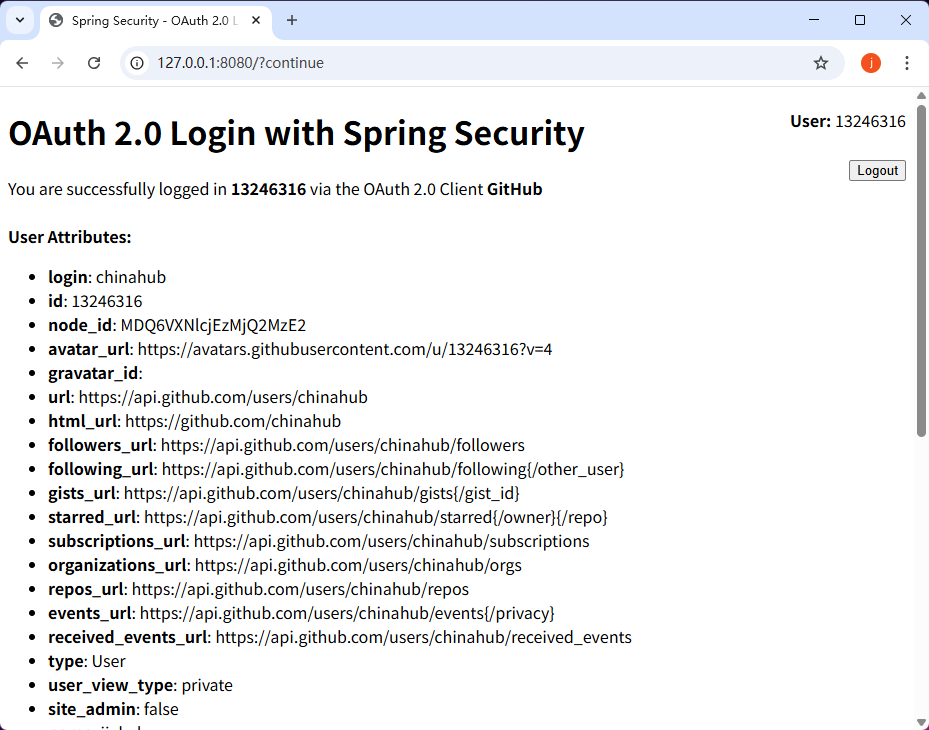 在右侧有登出按钮,点击后回到登录列表页面:
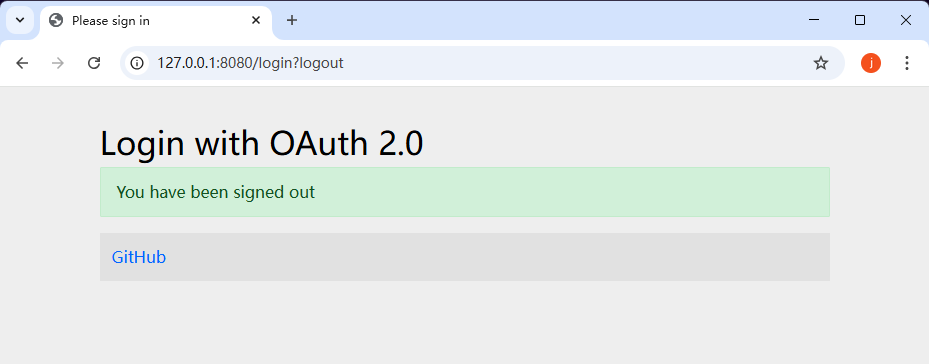 由于之前已经用户授权了,如果再次点击GitHub进行登录,会直接跳转到首页:
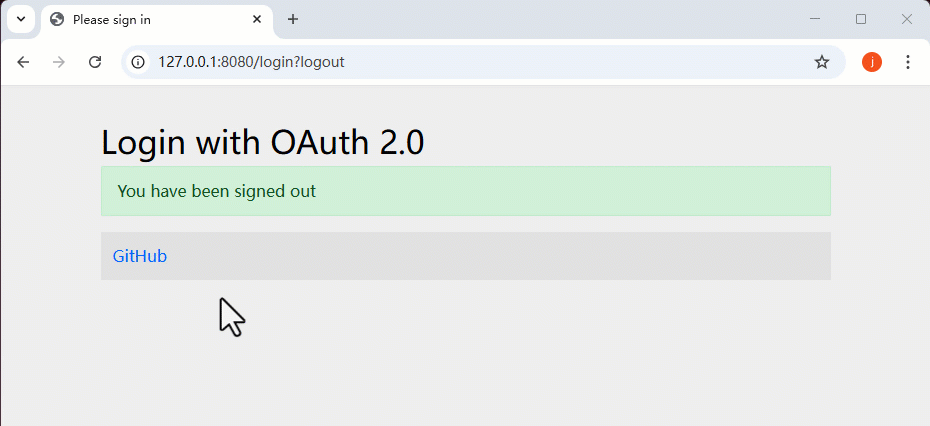
5. 登录流程分析
- A网站让用户跳转到GitHub,并携带参数ClientID以及Redirection URI。
- GitHub要求用户登录,然后询问用户"A网站要求获取用户信息的权限,你是否同意?"。
- 用户同意,GitHub就会重定向回A网站,同时发回一个授权码。
- A网站使用授权码,向GitHub请求令牌。
- GitHub返回令牌。
- A网站使用令牌,向GitHub请求用户数据。
- GitHub返回用户数据。
- A网站使用GitHub用户数据登录。
那么为何我们做了很少的配置,就能实现GitHub网站的OAuth功能呢,因为在CommonOAuth2Provider中为一些知名资源服务API提供商(如Google、GitHub、Facebook)预定义了一组默认的属性。例如,授权URI、令牌URI和用户信息URI通常不经常变化。因此,提供默认值以减少所需的配置。
public enum CommonOAuth2Provider {

    GITHUB {

		@Override
		public Builder getBuilder(String registrationId) {
			ClientRegistration.Builder builder = getBuilder(registrationId,
					ClientAuthenticationMethod.CLIENT_SECRET_BASIC, DEFAULT_REDIRECT_URL);
			builder.scope("read:user");
            // 用户认证授权接口
			builder.authorizationUri("https://github.com/login/oauth/authorize");
            // 获取token接口
			builder.tokenUri("https://github.com/login/oauth/access_token");
            // 登录完毕后,获取用户信息接口
			builder.userInfoUri("https://api.github.com/user");
            // 将用户id赋值给username
			builder.userNameAttributeName("id");
            // 设置clientName为GitHub
			builder.clientName("GitHub");
			return builder;
		}

	},
}